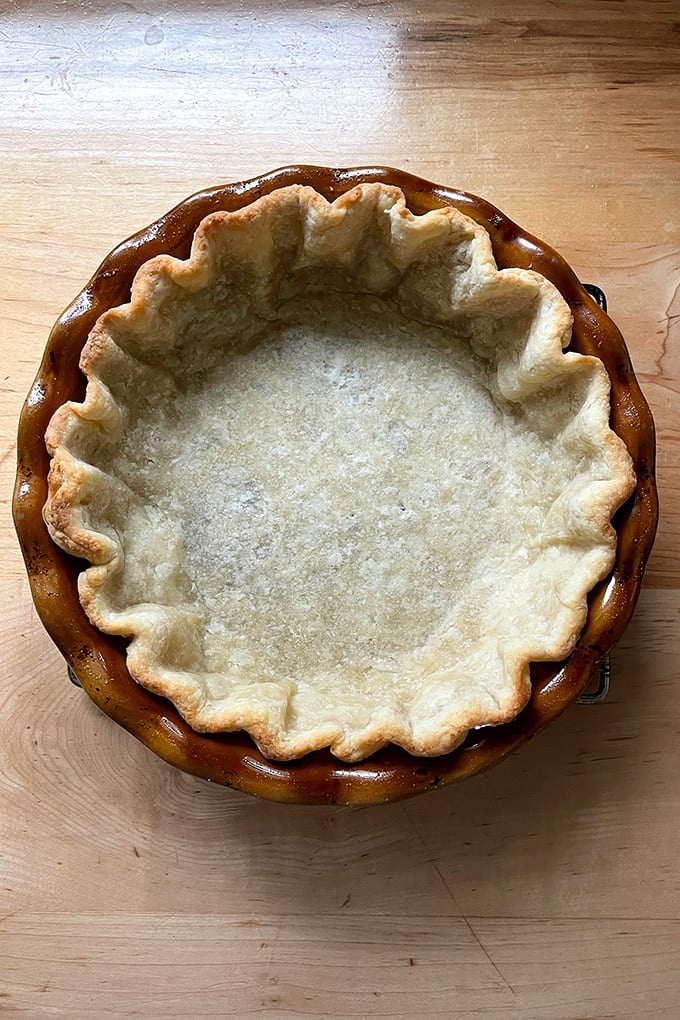
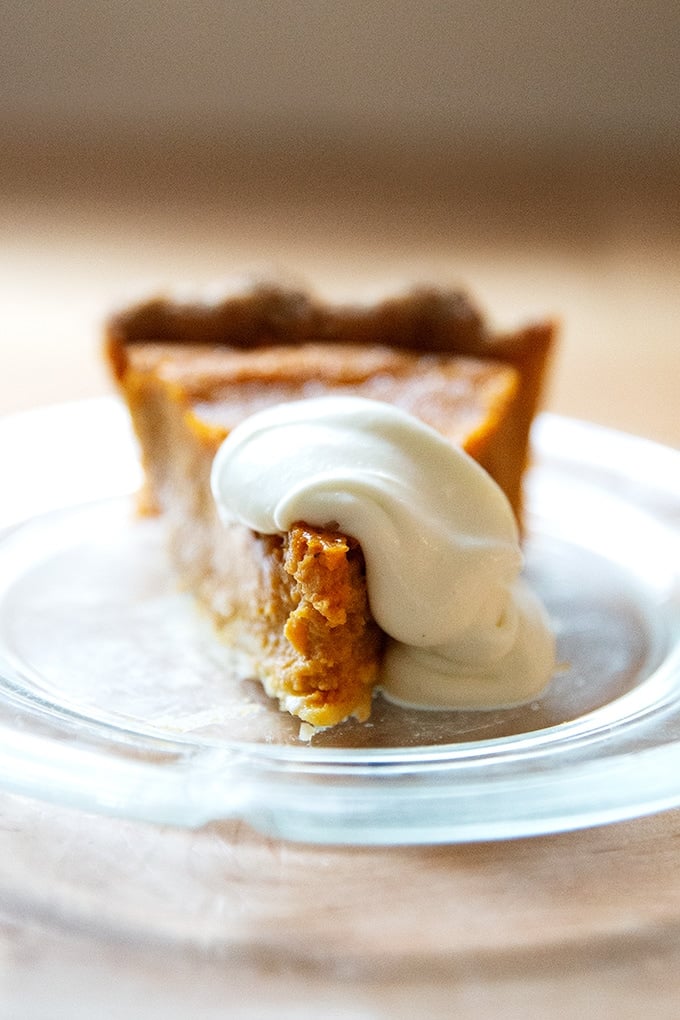
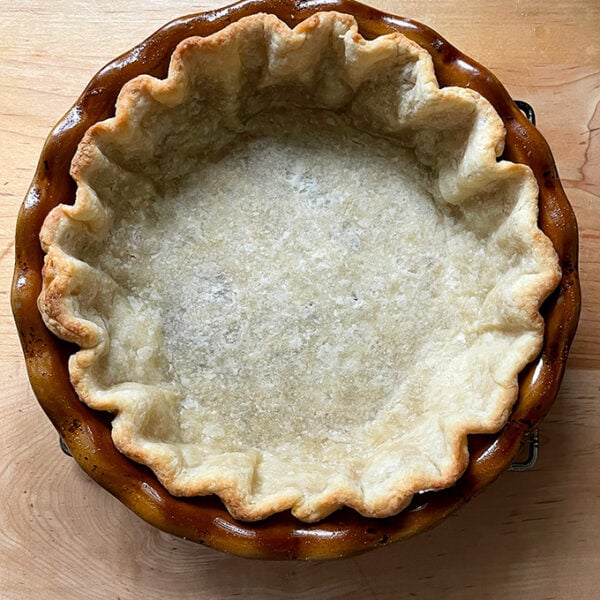
About this time of year last year, Erin McDowell’s The Book on Pie made its way into the world. It is a stunning book, overwhelming in its breadth and beauty, a tome filled with recipes and techniques for making any pie your heart desires, a comprehensive guide promising to answer any pie question to have ever crossed your mind. For me, the big question was: Is parbaking pie crust necessary? To prevent a soggy bottom, parbaking is a step required of many a Thanksgiving pie, and it’s a step I dislike for several reasons, including: My lack of parbaking success over the years has led me to skip the step altogether — to be honest, no one seemed to notice. It also pushed me squarely onto team galette. But last year, reading through Erin’s book, I realized I was doing it wrong: I have been severely overbaking my parbaked pie crusts. On page 46 of the book, a photo depicting a correctly baked, underbaked, and overbaked parbaked pie crust showed me my error: the bottom of a correctly baked parbaked crust should be barely toasted, mostly blonde with the faintest hint of brown; the edges should be lightly golden. Erin’s method calls for baking the pies with weights (or dried beans) for 15-17 minutes and for just 2 to 3 minutes more without the weights. I had never seen such a short time frame for parbaking, but I tested the method on my favorite Thanksgiving pie, Ronnie Hollingsworth’s most excellent squash pie, and the method worked beautifully! Do you see how nicely golden but not overly so the crust looks?: Friends, I am so excited to have this piece of the pie (ha!) resolved. But this is not all I’ve learned. Let me share a few more findings.
The Importance of Chilling Your Pie Dough
After you make your pie dough, you should let it rest in the fridge for at least 30 minutes or better, 12 to 24 hours, before you roll it out. Why? For two reasons:
Why You Shouldn’t Freeze Your (Rolled-Out) Pie Dough
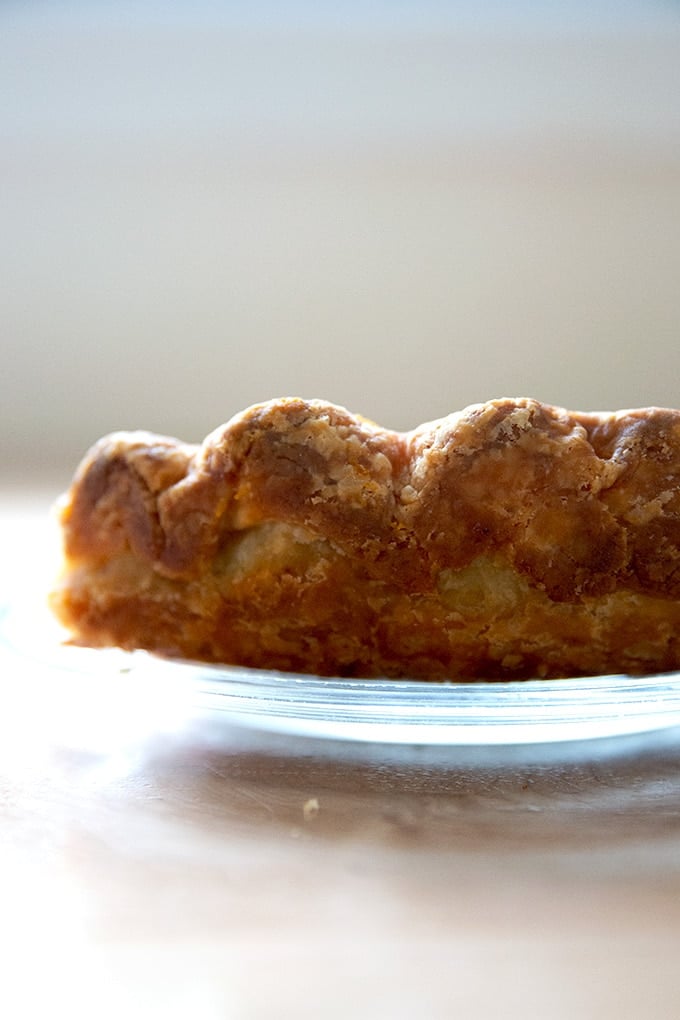
Although pie dough freezes beautifully in portioned discs, once you roll it out and fit it into your pie plate, you shouldn’t freeze it. This is because: “Freezing can mess with the way fat acts in the oven. While you do want dough to be cold, if it is baked from frozen, it may take a while for the butter to soften and thus delay the flaky puff-up effect that occurs when the dough hits the oven heat. This can lead to the butter melting out of the crust, making a greasy and/or smoky mess in your oven and a tough crust.” I tested this theory by baking one shell immediately after rolling it out and one I had frozen for 24 hours. I had suspected that the frozen one would hold its shape better, but I was wrong! It actually shrunk more, and, as Erin noted, made a smoky mess in the process because the butter melted out of the crust.
Two Parbaking Tips
Friends, there are a few photos below, but I think the video will be most helpful here. It starts with my favorite foolproof food processor pie dough recipe, which employs a tea towel trick I learned from a French woman years ago, and ends with a parbaked shell.
Pie-Making Schedule
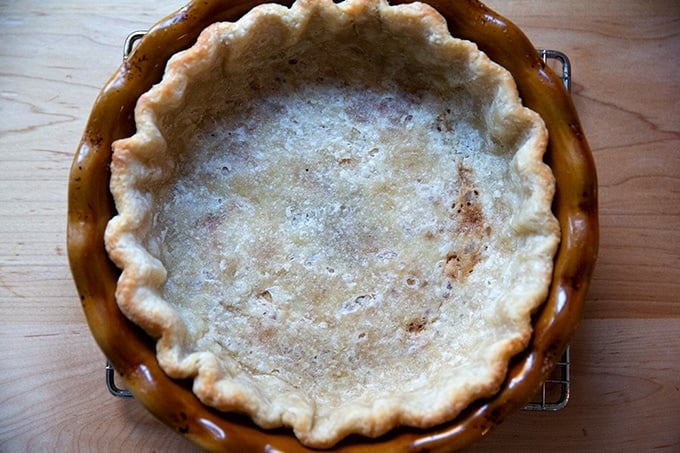
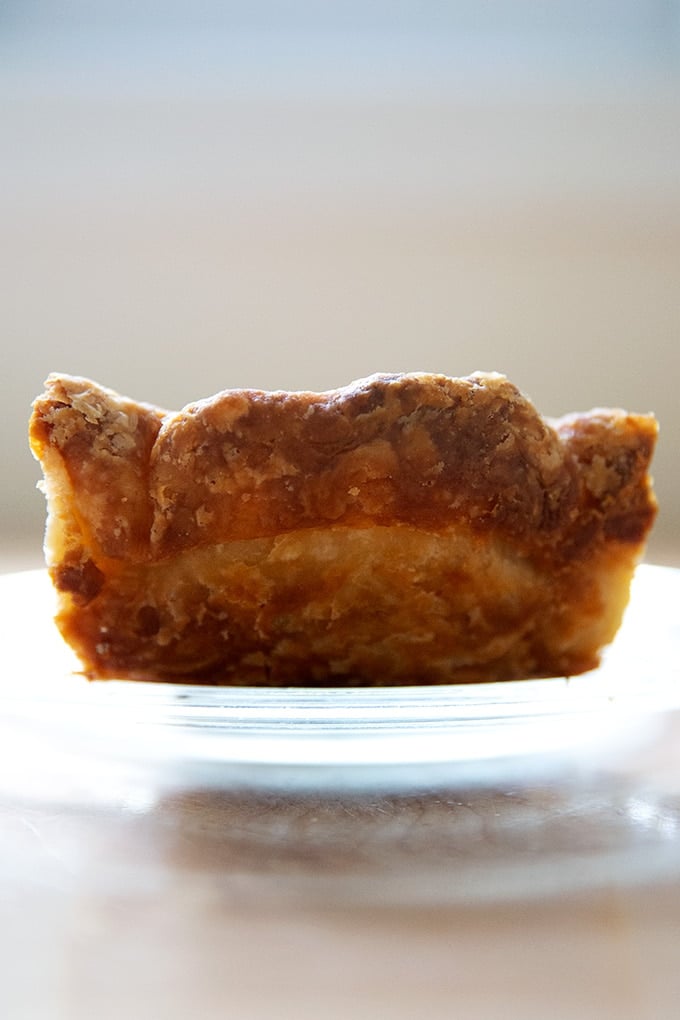
This is a great schedule to follow if you are making pies for Thanksgiving or any holiday: Tuesday (or 2 days prior to when you plan on serving your pies): Make the dough and chill it. Wednesday: Parbake the crust. Thursday: Fill and bake the pie. Above: This pie shell is about to enter the oven. Note: You can save those dried beans and use them again and again: let them cool; then stash them in a Ziplock bag. Below: This is a just-baked parbaked pie crust. This is Ronnie Hollingsworth’s Most Excellent Squash Pie, which I made with a can of pumpkin purée in place of the roasted squash for this recent experiment. It was good, but I missed the squash. Can you see how flaky the crust is? 4.8 from 33 reviews
Bourbon Pecan Pie Roasted Butternut Squash Pie (i.e. The Best Pumpkin Pie) Salted Maple Pie
Notes:
Ideally make your dough 12 to 24 hours before you plan to roll it out. Doing so allows the flour to fully hydrate and allows the gluten to relax. This makes rolling the dough out more easily and also helps minimize shrinking in the oven. Dough can be made up to three days in advance and stored in the fridge or made weeks in advance and stored in the freezer. To thaw, place dough in the fridge overnight before baking. To make a double batch: do not load your food processor with double quantities. Make the dough in separate batches — no need to wash the food processor in between batches. Favorite Pie Plate: I swear by my ceramic Emile Henry 9-inch Pie Plate. Once you parbake your pie shells, let them cool completely; then store in an airtight vessel or bag — an XLarge (2-gallon) Ziplock works well. Store at room temperature for up to 3 days or freeze for up to 3 months.