So, let’s dive into the recipe and learn how to make the authentic dal makhani recipe. Both stovetop and Instant Pot versions are included in the post.
If you happen to walk into my home on any Sunday afternoon, the smell of dal makhani will greet and envelop you as you walk through the doorway. And that tempting smell that makes your mouth water would invite you to sit down and enjoy a few servings of homemade dal makhani. Traditions run deep, and now I am doing the same for my kids. To serve the lentils in an exciting way, I, at times, improvise the recipe with seasonal vegetables. Sometimes I like to serve my lentils in the form of soups such as – Roasted Red Bell Pepper lentil soup, Butternut squash and lentil soup, or occasionally I would make Stuffed aloo tikkis, Shorbas, moong dal burfi, or pair it with seasonal vegetable and make Lauki chana dal.
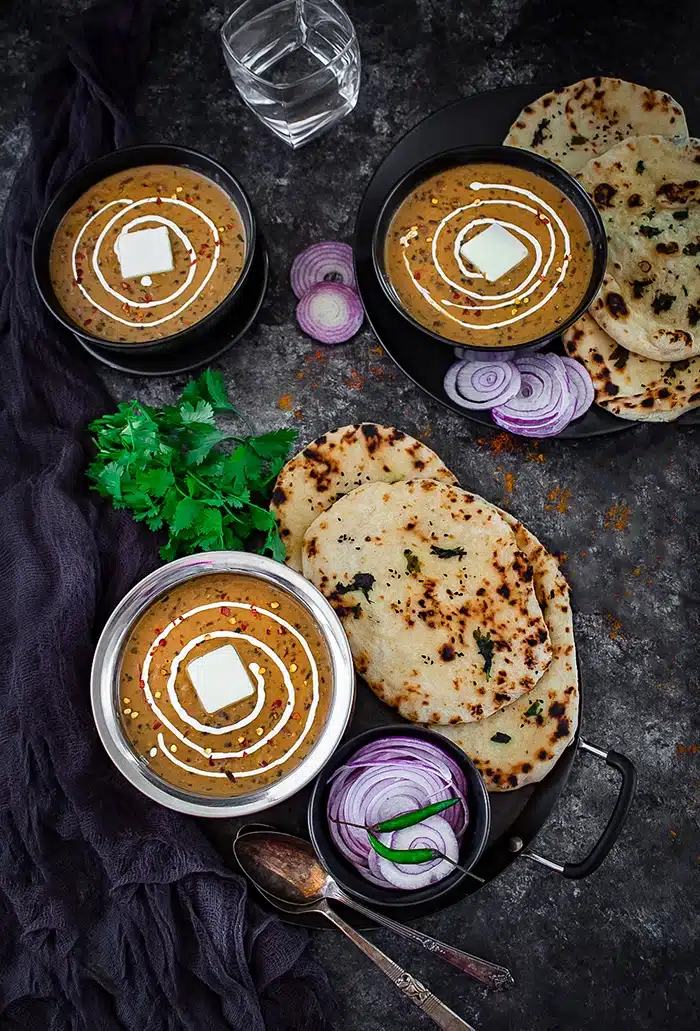
Collectively it translates to Lentils cooked with lots of ghee or butter. Besides the combo of lentils and beans, this dish is made with lots of onions, ginger, garlic, tomatoes, and traditional Indian spices. Follow the step by step dal makhani recipe below, and there’s no way you can go wrong with this dish. This gluten-free wholesome dal is going to be our dinner tonight with homemade tandoori roti. Or you can match it with steamed rice, salad, or parathas for a satisfying lunch or dinner.
» Onion – I have used one medium finely chopped red onion. You can use white onion instead. For a smooth texture, you can try grinding the onions instead of chopping. » Ginger and garlic – the essentials that play a huge role in Indian dishes. I always prefer to use fresh ginger and garlic in my recipes. However, you can use the jarred ones too. » Tomatoes – Use two medium-sized tomatoes. Dice them into small pieces; this way, they will dissolve quickly in the dal. However, you can use one large can of diced tomatoes to speed up the process. » Tomato paste – Do not pass on this one as tomato paste lends kaali dal a creamier texture. » Spices – degi mirch, salt, turmeric, coriander powder, garam masala, and cumin seeds. » Butter – salted or unsalted, both will work. However, I prefer the unsalted one, as this way I can control the salt in the recipe. You can swap butter ghee. » Kasoori Methi – adds a beautiful earthy and nutty taste to Maa ki dal. » Milk – Instead of water, I prefer to boil dal makhani in full-fat milk because it adds richness and a subtle flavor to our dal. If dal makhani is cooked in milk, you can easily cut down on cream. » Cream – Use heavy cream anything that has a fat content of 35% or higher. » Cilantro leaves – as a garnish. Rinse the lentils and beans until tap water. Rub the grains in between your fingers to get rid of all the residues. Transfer the rinsed lentils to a clean bowl. Soak the dal in enough water to cover the dal by about an inch. Make sure the grains are completely submerged in water. Soak the dal overnight. Always use a large bowl to soak the dal as soaked and rehydrated dal will swell and double in size. Soak the dal for 8 hours or overnight
Pour in water, around 3 cups. Make sure the dal is completely submerged in water. Add salt and turmeric to Maa ki dal. Mix to combine. Seal the pressure with the lid and pressure cook the dal for 12-14 whistles. Remove from heat and allow the steam to release naturally. Carefully open the lid and check the dal. Take a Rajma between your fingers and apply gentle pressure; if it breaks easily, the dal is ready. With the help of a masher, gently split the dal. We don’t want a mushy dal; therefore, mash it gently, meaning only a few presses here and there.
Pour in water. Make sure the dal is completely submerged in water. Add salt and turmeric to the lentils. Mix to combine. Seal the Instant Pot with its lid and set the valve to SEALING. Press pressure cook/Manual on the front panel and adjust the time to 25 minutes on HIGH pressure. The display will read as ON until the IP comes to pressure. This will take about 10-12 minutes. Once the cooking time has elapsed, your Instant Pot will beep; allow the Instant pot to sit. Let the pressure release naturally. Once the Instant Pot pin drops, carefully open the lid and check the dal. Take a Rajma between your fingers and apply gentle pressure; if it breaks easily, the dal is ready. With the help of a masher, gently split the dal. We don’t want a mushy dal; therefore, mash it gently, meaning only a few presses here and there.
Stir in ginger and garlic paste.
Sauté for a few seconds until the raw smell goes away. Maintain the heat at medium and keep stirring continuously as we don’t want to burn the garlic.
Add chopped onions to the pan. Mix well.
Add degi mirch. Mix to combine.
Now, add chopped tomatoes.
Keep stirring until the tomatoes break down and dissolve in the gravy.
Cook, stirring frequently until the oil separates from the masala.
Mix it well. Stir in the spices – coriander powder, garam masala powder, and salt. Mix to combine.
Now, add the boiled dal to the pan.
Add 3/4 cup of milk and lower the heat to the lowest setting.
Mix well. Allow the dal to simmer uncovered at the lowest setting for about an hour. Keep stirring occasionally to prevent the dal from burning or sticking to the bottom of the pan.
After the dal has simmered for an hour, it will appear thick; add 3/4 cup of lukewarm water to the dal. You may need more, so add accordingly. Add cream.
Add kasoori methi and allow the dal makhani to simmer for another 5-10 minutes at the lowest setting.
Dal will have a velvety and creamy texture by now. Take it off the flame and cover it with a lid.
Heat butter or ghee in a separate pan. As the butter heats up, add garlic paste to the pan. Sauté for a minute.
Add Kashmiri chili powder to the pan. Mix well.
Take the pan off the heat and pour this tadka over dal makhani.
Mix until fully incorporated.
Heat 2 pieces of charcoal briquettes over direct heat until red hot.
With the help of tongs, carefully drop the burning charcoal into a steel bowl or Katori.
Drizzle two teaspoons of ghee on top of the charcoal.
The charcoal will start to emit smoke. Immediately cover the bowl with a glass lid and let the dal makhani soak in all that smoky flavors for about 3-4 minutes. After 4 minutes, remove the lid, carefully lift the hot bowl, and set aside. PROTIP – Do not throw the charcoal into the bin right away. It’s still very hot. Let it cool down completely, then dispose of. Give the dal a final mix. Garnish dal makhni with butter and serve hot. Dal makhni thickens as it cools; therefore, add more water to adjust it to the consistency you like.
» To soak or not to soak – That’s a very questionable topic, but I always prefer to soak because of two main reasons –
First, soaking reduces the cooking time. When soaked for 6-8 hours or overnight, the dal softens, hydrates, and doubles in size. Second, soaking breaks down the complex sugars that can make beans hard to digest. Soaking, in fact, improves digestibility and reduces the gas-producing properties of beans.
» If you forgot to soak the dal and beans, rinse them and soak in boiling water for 2-3 hours. Cooking unsoaked dal will take significantly longer to cook. » To make dal makhani without onion and garlic, simply skip the steps where I have added onion-garlic paste to the recipe. The rest procedure to make dal makhni remains the same. » Ghee, cream, and butter lend a rich and creamy texture to dal makhani; therefore, please do not cut back on these two. Be generous as they are the backbone of this recipe, and trust me, you are going to love the melt-in-your-mouth texture that’s produced by these ingredients. » I prefer to cook Maa ki dal with red onions as they have a mild flavor. The red onions don’t have a strong flavor as compared to other varieties. » This recipe can easily be scaled up or down to suit your preferences. » For a completely smooth texture, you can substitute chopped tomatoes with store-bought tomato puree.
Simmering extracts the full flavor from the dal and makes it rich and creamy. This is one of the biggest reasons I switched to the old fashioned way (stovetop cooking) after boiling my dal in the Instant Pot. So, guys, if you plan to make dal makhni to feed a large gathering, I would suggest the stovetop version. Because you just can’t wing a large batch of dal makhni in the Instant pot as you might when cooking dal in a regular stovetop pan. PROTIP– Make sure you do not cook dal makhni on a high flame. Overcooking will lead to a pile of mushy dal. Therefore, after the first boil, lower the heat and allow the dal to simmer slowly.
Likewise, you can swap cream/milk with cashew cream or any plant-based milk.
How to store leftover dal makhni?
Even a small serving of kaali dal yields a large amount of dal, which means it’s perfect for leftovers. And not to mention, leftover dal makhni tastes even better the second day. Allow the dal to cool to room temperature. After that, you can store it in an airtight container in the refrigerator for about 3 to 4 days. Leftover dal freezes beautifully for easy future meals! You can freeze kaali dal for up to 3 months in freezer-safe containers. To thaw the dal, place the container from the freezer on the counter for 2 hours. Dal thickens after cooling. Just restore it to its original consistency by adding a little water to reach the desired consistency. Warm it in the microwave or over stovetop until heated through. Without utilizing another minute of yours, let’s scroll down to the recipe card for a detailed ingredient list and step by step instructions. Should you make this Dal makhani recipe, please leave me a comment below, and don’t forget to share it with your family and friends.
CRAVING FOR MORE, TRY THESE OTHER Indian DELICACIES: