Nearly every week someone writes me asking if I have a baguette recipe. They’ll say: “I checked your bread archives and couldn’t find one, but wanted to make sure I didn’t miss anything.” They hadn’t! I’ve hesitated to add a baguette recipe here for a number of reasons, namely because before recently, I hadn’t had much success with them. Over the years I’ve dabbled, but I’ve found the process discouraging from the shaping (requiring very practiced hands) to the equipment (couches, lames, lava rocks) to the baking (demanding steam). Baguettes, I resigned, were best left to the professionals. But at some point a few months ago, I rolled an extra round of pizza dough into a log, threw it in my Challenger Bread Pan, and baked it. And when it emerged golden and crusty, I felt hopeful. And when I halved it to reveal a wild amorphous crumb, I nearly cried. Kidding. However, there is something very satisfying about producing a deeply burnished, light and airy baguette, in your own kitchen. Since this first successful bake, I have experimented with a number of different baking methods, and in this post, I have outlined the two (actually three… see below) I’ve had the most success with: one calling for the Challenger Bread Pan or other oval-shaped Dutch oven and the other for a Baking Steel or baking stone plus a turned-over disposable aluminum pan. What do the two methods have in common? They both use a lid for the first ten minutes of the baking process. Why? To create steam. And why is steam good? Let’s jump right in. Warning: This post gets a little nerdy. I consulted two books, Chad Robertson’s Tartine Bread and Jeffrey Hamelman’s Bread, while writing this post. Know this: if I can get it, so can you!
Why is steam good for baguettes?
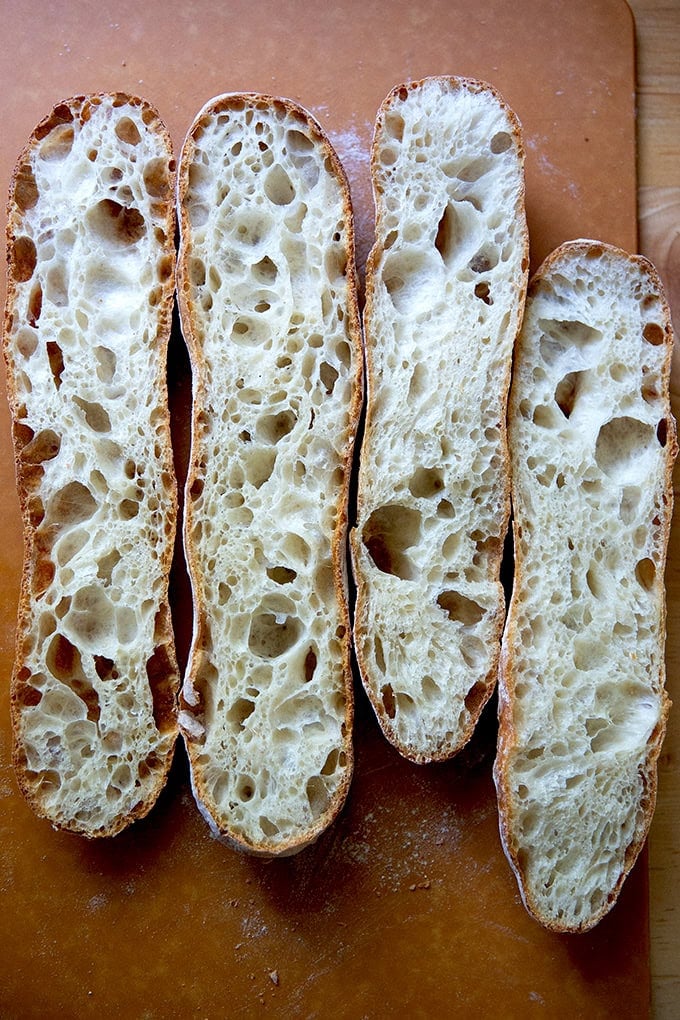
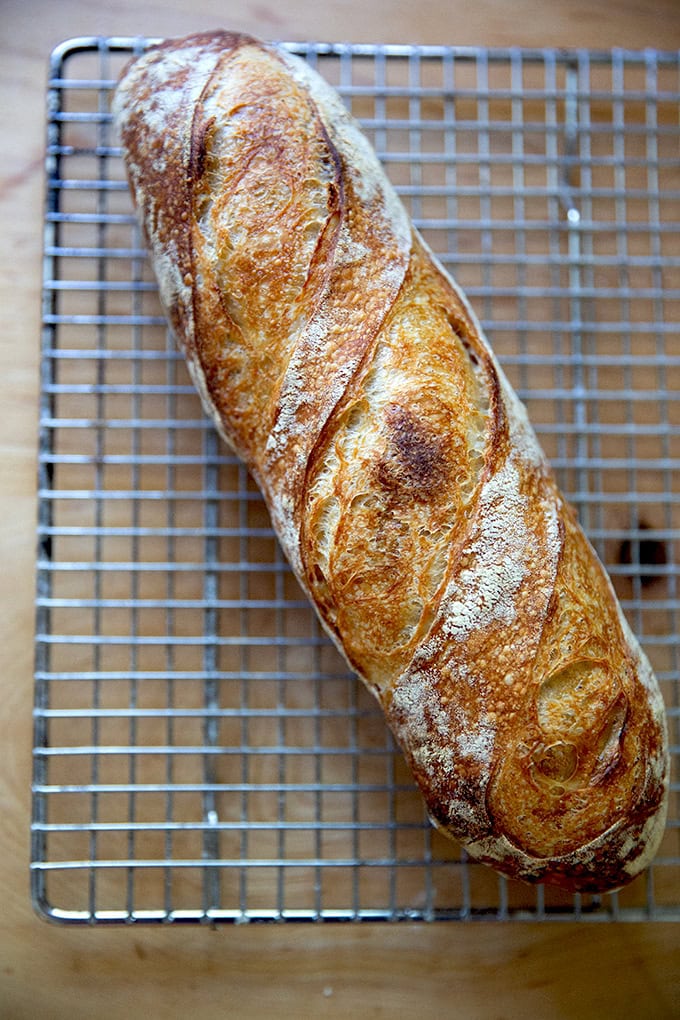
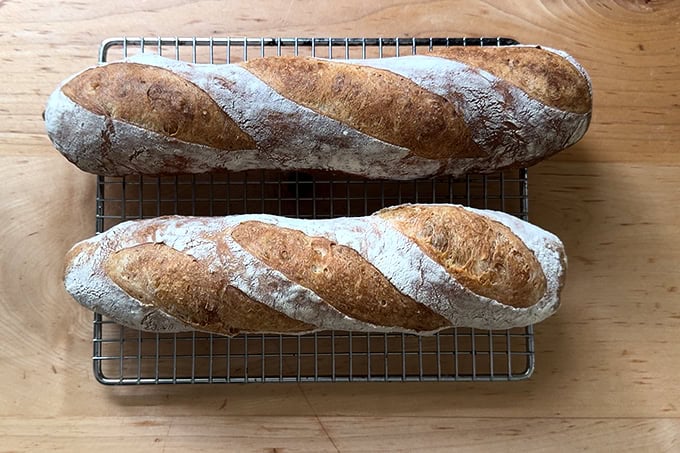
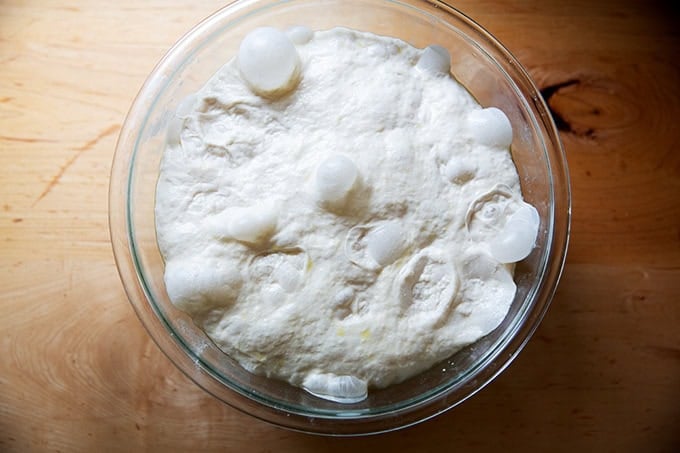
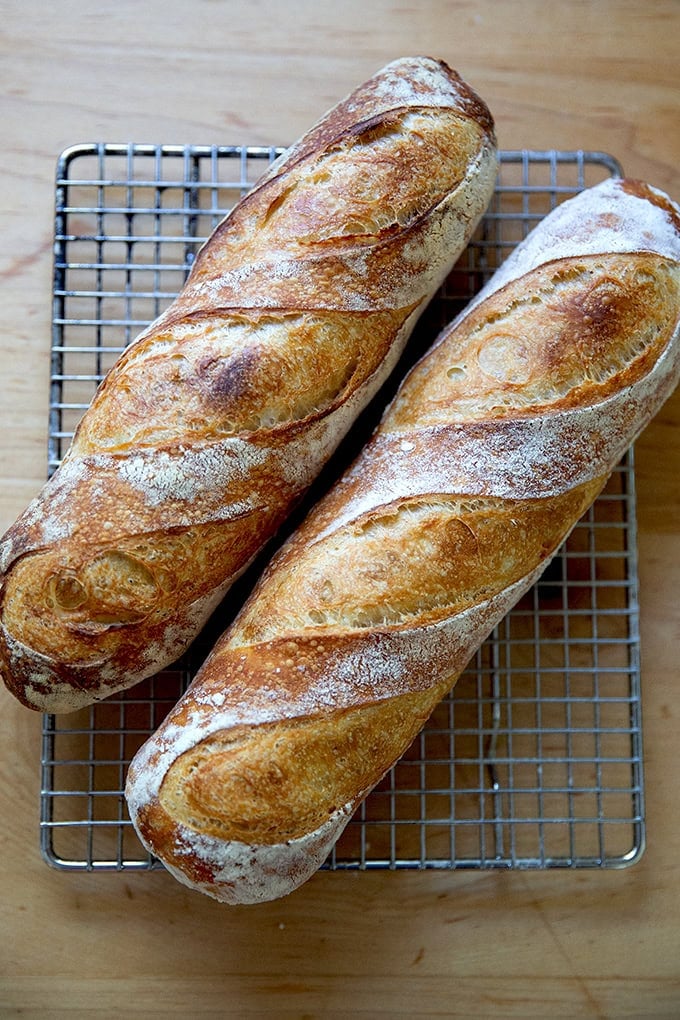
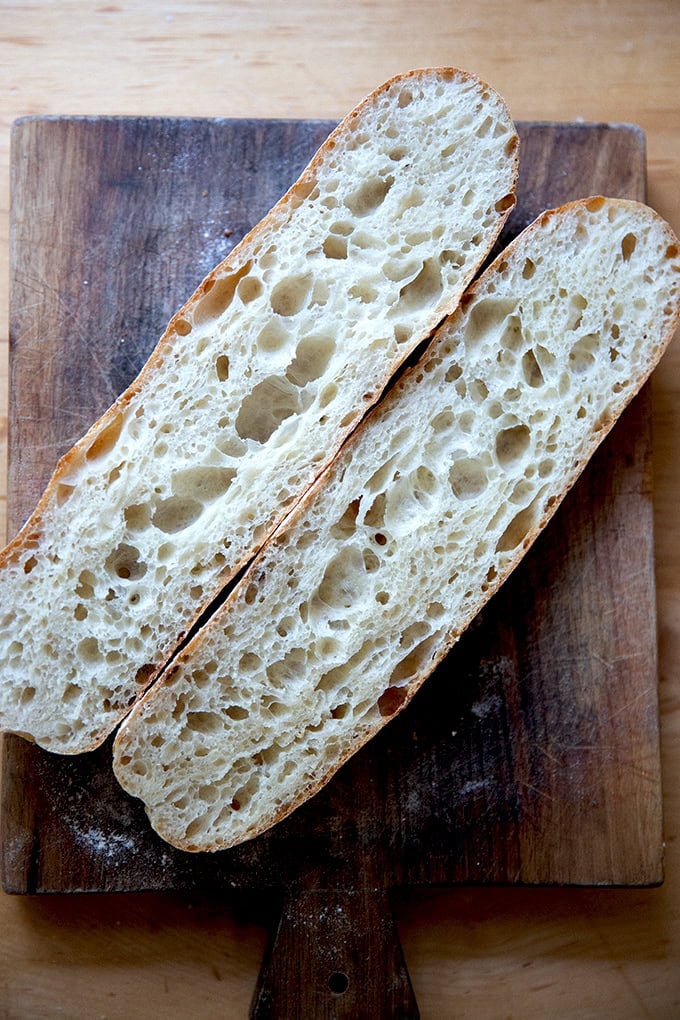
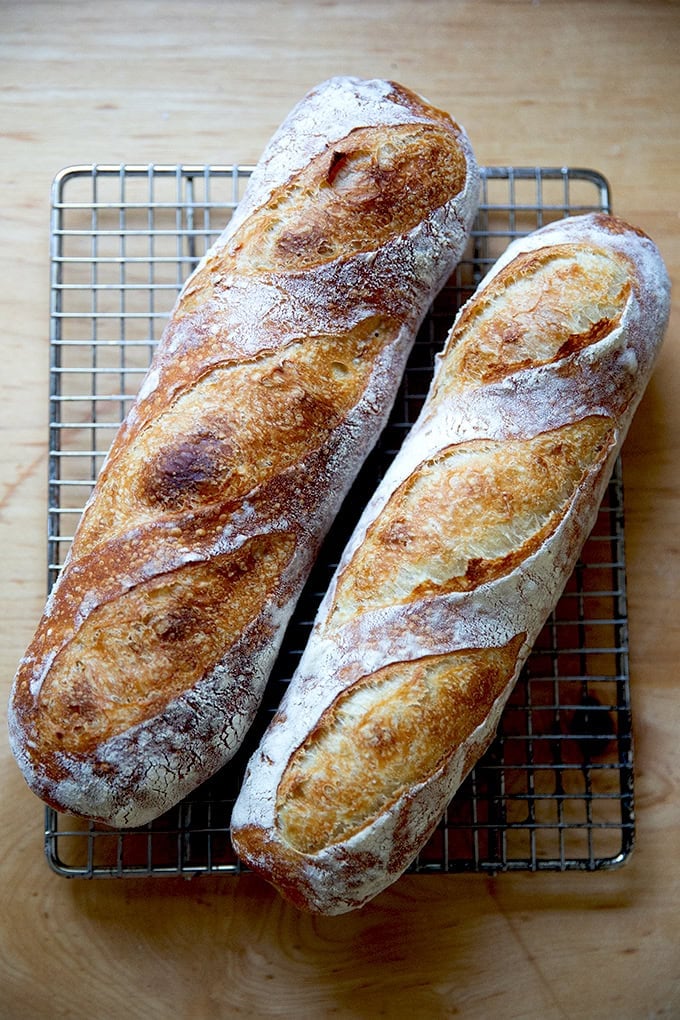
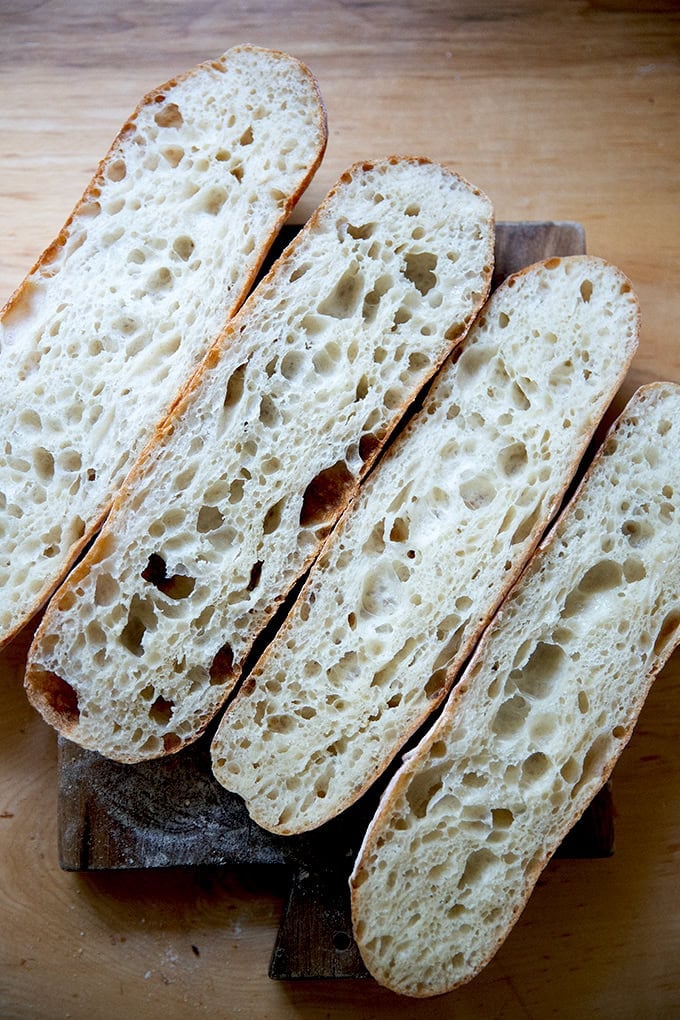
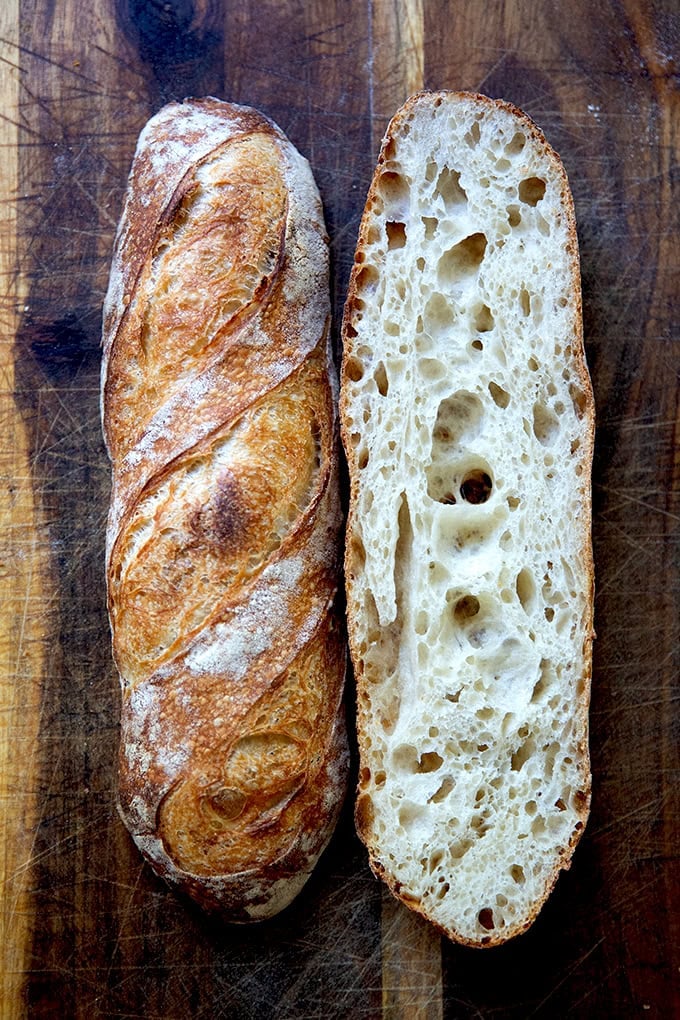
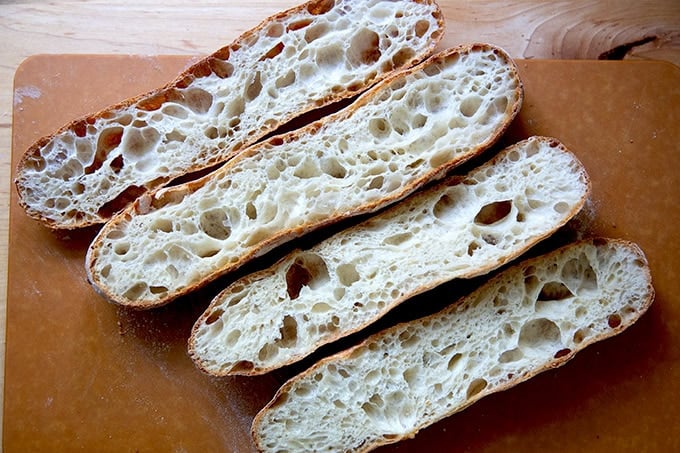
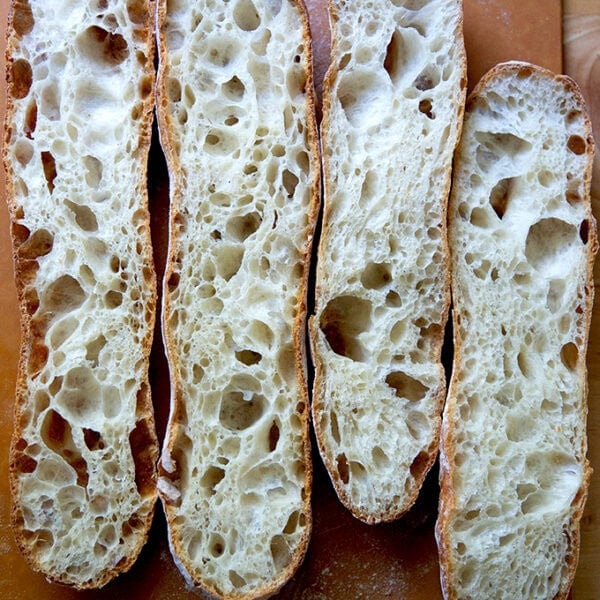
Steam is good for baguettes (and many breads, such as this simple sourdough bread recipe and Jim Lahey’s no-knead bread) for two reasons: oven spring and crust development (both color and texture). Let’s start with oven spring. First of all: what is oven spring? In short, oven spring is exactly as it sounds: dough springing in the oven upon entry. Dough springs in the oven for a few reasons: 1. Increased fermentation activity, meaning as the yeasts rapidly multiply in the hot oven, the dough produces carbon dioxide gas. 2. Steam: As water in the dough evaporates it transforms into steam. Both the carbon dioxide gas and the steam push against the gluten structure, causing the dough to spring. A moist, steamy environment allows for maximum oven spring because it allows the dough to expand to its fullest potential before a crust forms. In other words: when dough stays soft during the early phases of baking, its oven spring will be greater because it isn’t being restricted by a dry, hard crust. And the reason we want dough to spring to its potential is because a greater spring promotes a crumb that is light and airy. Make sense? Now onto crust color and texture. In the early stages of baking, the rapid increase in enzymatic activity on the surface of the loaf breaks down the starches in the dough into simple sugars. These sugars ultimately contribute to crust color. In a steamy environment, the enzymes remain active for longer, leading to an even richer color. A steamy environment will also help produce a crust with a subtle sheen. This is because, during the early stages of baking, the starches on the surface of the loaf gelatinize — meaning they swell with water, and as they break down, they form a gel. During the last 10 minutes of baking, when the lid is removed and the baguettes are baking in dry heat, that gel layer dries out, transforming into a shiny crackly crust as opposed to one that is dull and hard. Compare the two photos below. This first one shows a baguette baked with steam: In the below photo, the baguettes were baked on the Baking Steel without steam. In the above photo, observe the caramelization of the crust, the score differentiation, and the slight sheen. Compare it to the dry, lusterless crusts below: Note: In my experiments, I tried using other methods to create the steamy environment: ice (adding ice cubes to a skillet placed next to the loaf during the first 10 minutes of baking) and water (pouring water into a hot skillet set next to the loaf). While both methods indeed created steam, I found them mostly ineffective in terms of creating a nice crust. So, to recap: baking in a sealed environment is important to create steam, which is optimal for good oven spring and crust formation. But steam is not the only factor responsible for producing a baguette with a beautifully burnished crust and light and airy crumb. Time is essential, too.
Why is time good for baguettes?
When dough rises slowly, good things happen: during a long, slow fermentation, enzymes in both the flour and the yeast break down the starches in the flour into simple sugars, which contributes both to flavor and to browning. If you make your dough at least a day before you plan on baking it, you will see improved flavor and browning. It’s for these reasons, I always make my pizza dough two to three days before I plan on cooking it.
Timelines
This dough calls for a long slow initial rise, roughly 6 to 10 hours depending on the time of year and the temperature of your kitchen. Following this first rise, you’ll ball up your four portions of dough and, ideally, store them in the fridge for a day or two for the above-mentioned reasons: time = goodness. The beauty of this method is that you can store the dough balls in the fridge for as long as a week, and you can bake off the baguettes one at a time as needed. Unless you are baking for a lot of people, you don’t want to have lots of extra baguettes on hand — while they reheat fine on subsequent days, baguettes are best eaten the day of. On baking day you’ll want to remove your dough three hours before you plan on baking. All of this said, you can skip the fridge time all together — find a photo just before the recipe card at the bottom of the post that shows a baguette that experienced no fridge time: the dough was mixed Friday evening; the baguettes were baked Saturday afternoon. Example Timeline #1: Fridge Time
Wednesday Evening: Mix Dough Thursday Morning: Ball Up Dough, Transfer to Fridge Friday Afternoon (or any subsequent afternoon for as long as a week): Remove Dough Ball From Fridge 3 Hours Prior to Baking Friday Evening: Bake Baguette
Example Timeline #2: No Fridge Time
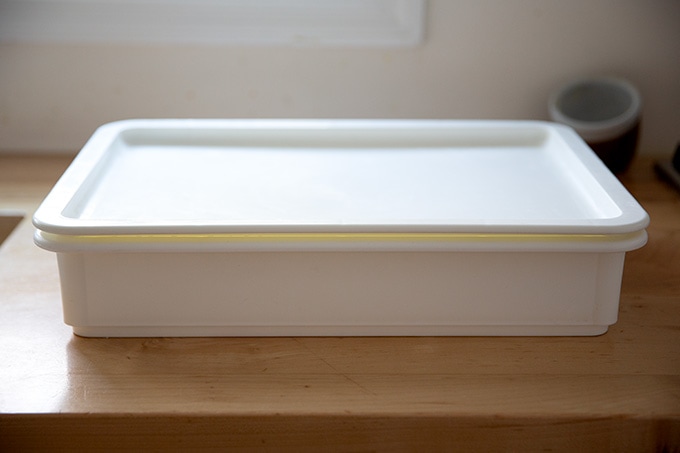
Thursday Evening: Mix Dough Friday Morning: Ball Up Dough, Transfer to a Lidded Vessel (such as a DoughMate), Leave at Room Temperature for Two Hours. Friday Midday: Shape the Dough Balls into Baguette Shape and Return to Lidded Vessel, Leave at Room Temperature for Roughly Two Hours More. Friday Afternoon: Bake the Baguettes
Ready? You got this 🥖🥖🥖🥖🥖
How to Make Baguettes, Step by Step
I’ve broken down this step-by-step guide into three sections:
Part I: Mixing and Portioning the Dough Part II: Shaping and Proofing Part III: Baking
Part I: Mixing and Portioning the Dough
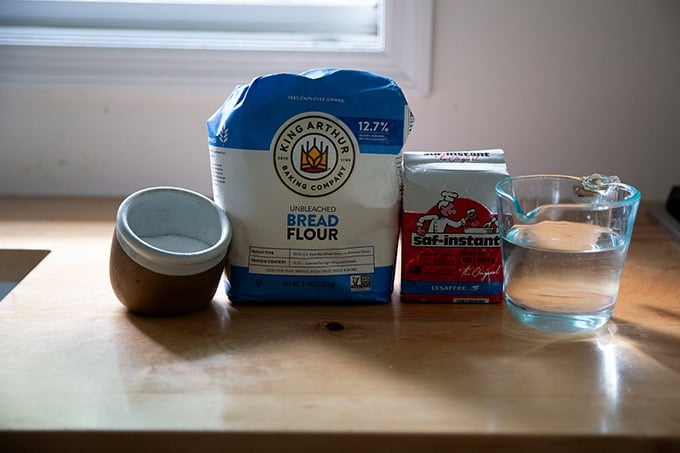
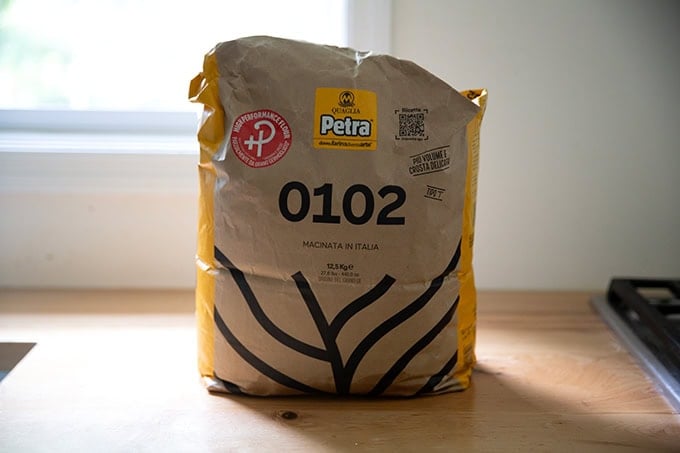
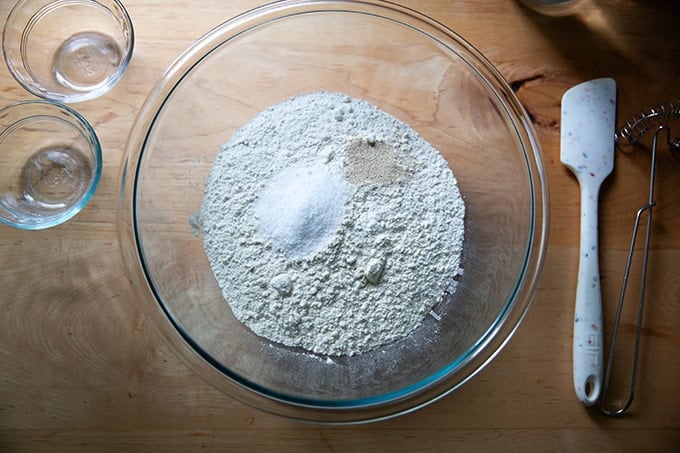
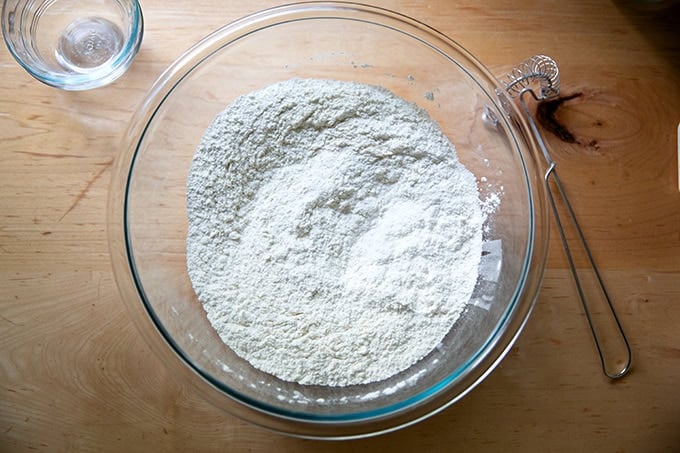
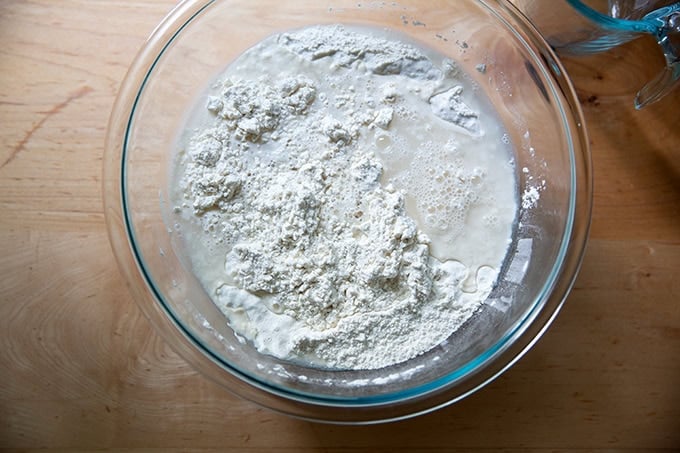
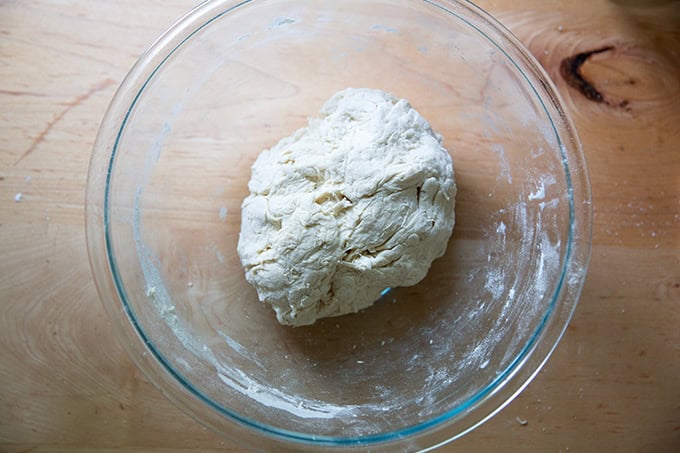
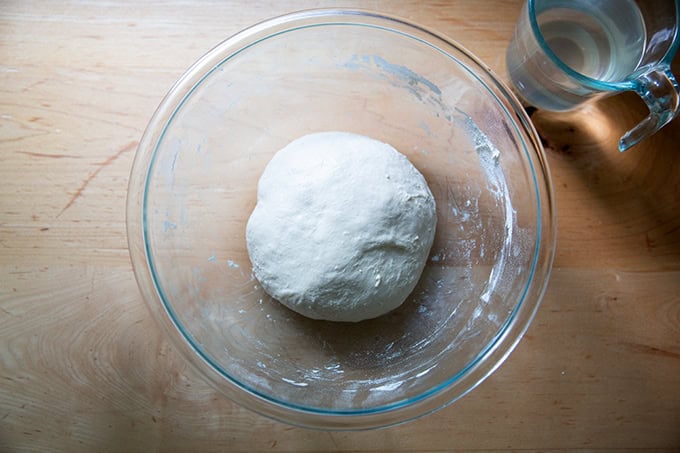
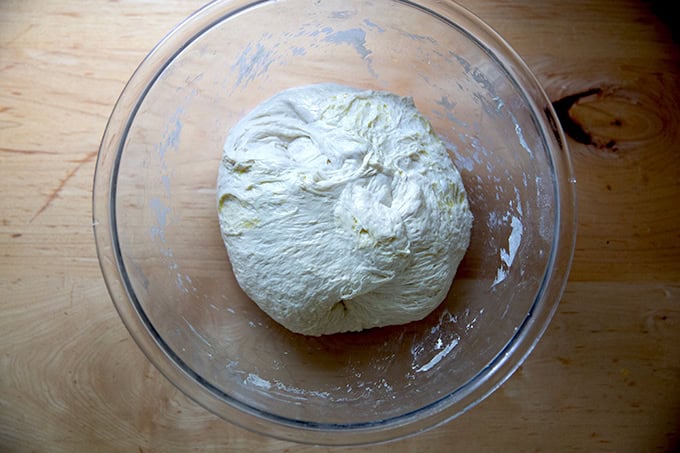
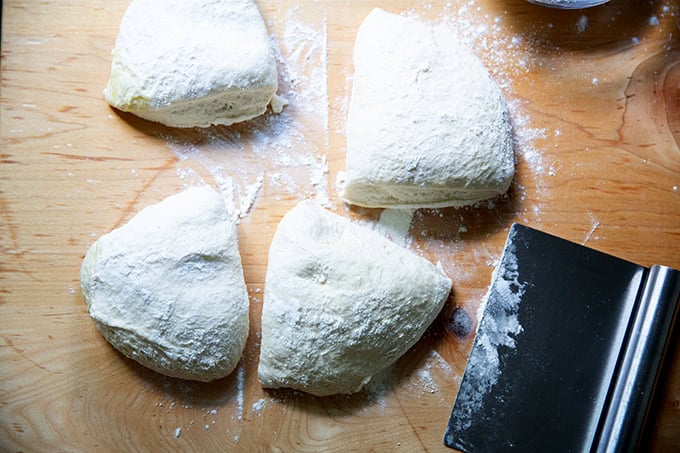
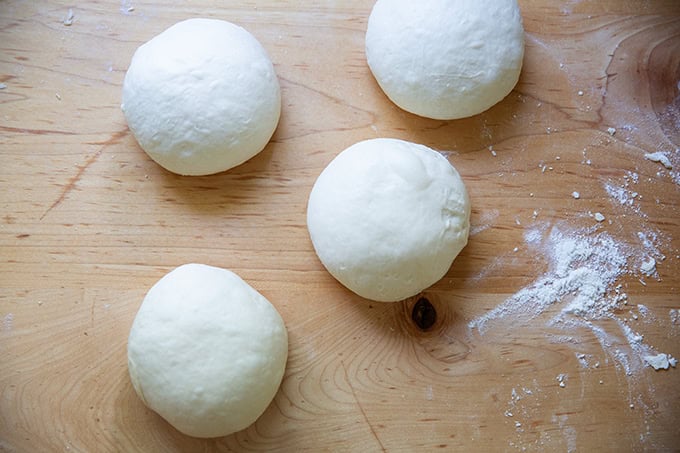
Gather your ingredients: flour, salt, yeast, and water. I conducted most of my experiments with King Arthur Bread flour, since it is widely available and such a reliable flour. SAF instant yeast is my favorite. See notes in the recipe box regarding salt. I also had excellent results using this Petra 0102 flour, which is made from partially sprouted wheat flour and which I love for the flavor and texture it lends to a bread or pizza. Measure everything out, ideally with a scale: Combine the dry ingredients together first: Whisk them together: Then add the water: Mix until you have a shaggy dough ball: Let it rest for 30 minutes or so, then stretch and fold it (see video for guidance): Cover the bowl with an airtight lid, then let it rise at room temperature until it doubles in volume and its surface is covered in bubbles. Using lightly floured hand, deflate the dough: Then turn it out onto a work surface and divide it into four equal portions. I do like to use a scale to ensure each portion is identical, roughly 237 grams each. Ball up each portion: Transfer to storage vessels: Then transfer to the fridge ideally for at least a day. The dough balls can stay in the fridge for as long as a week.
Part II: Shaping and Proofing
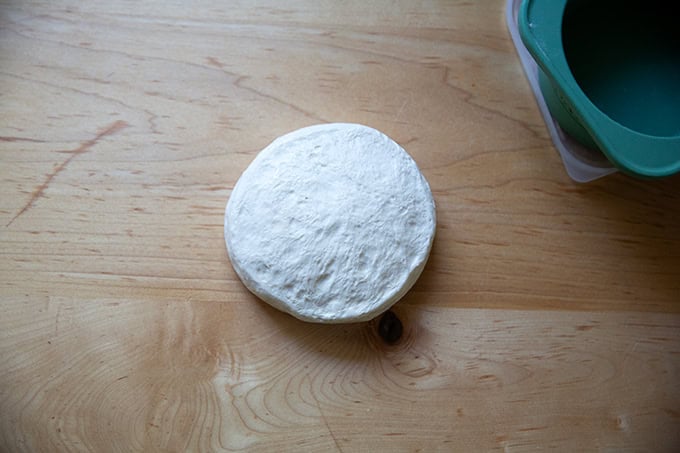
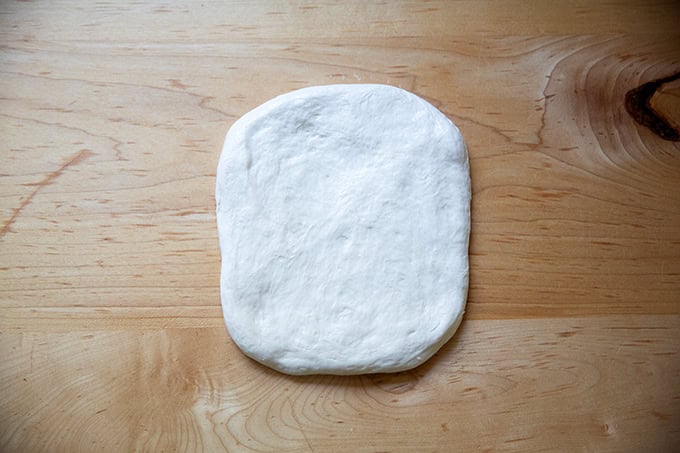
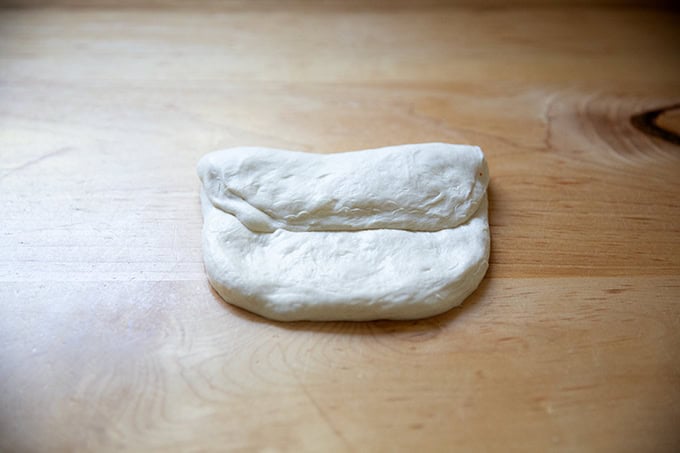
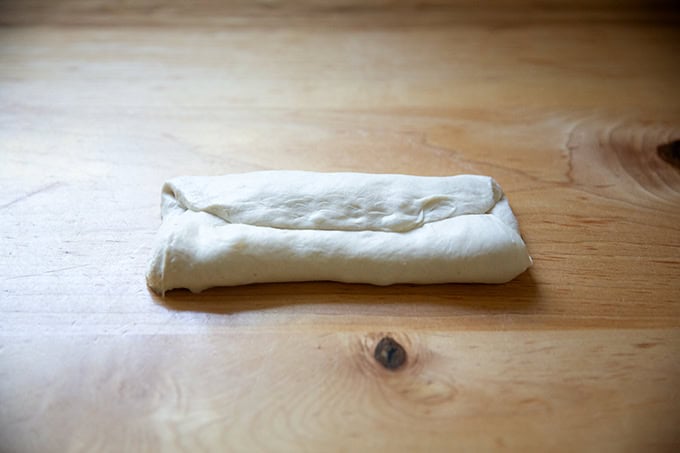
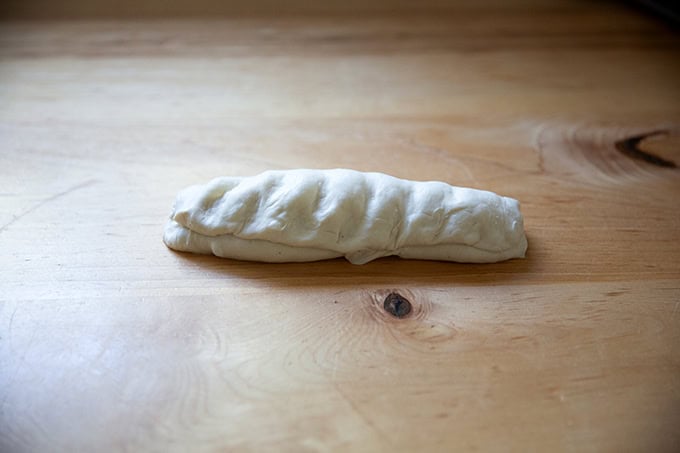
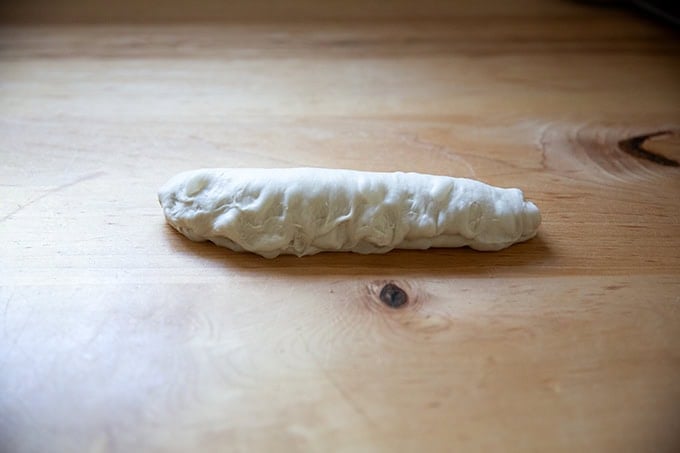
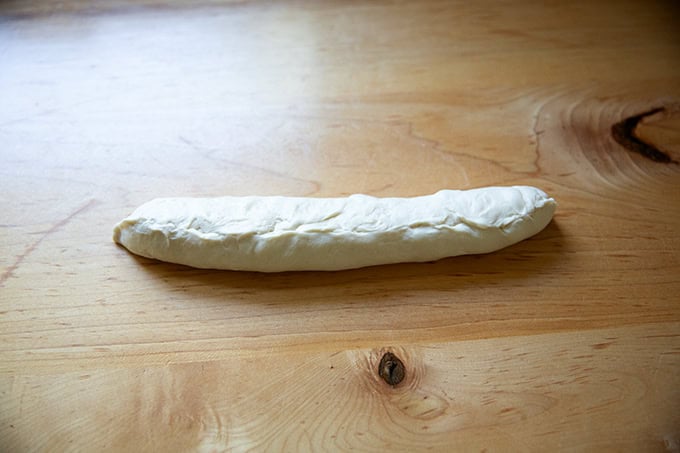
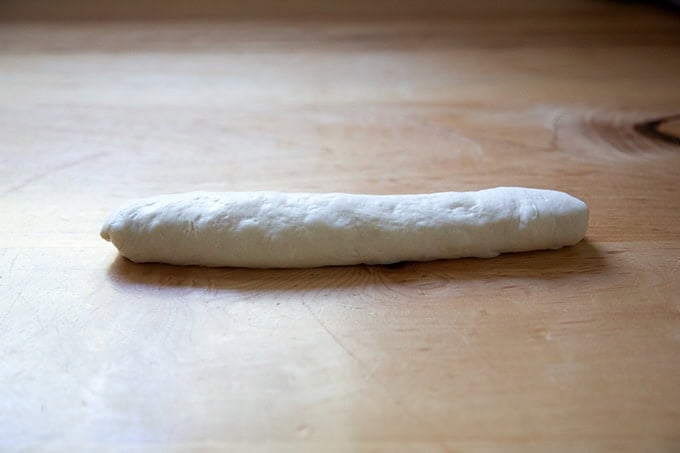
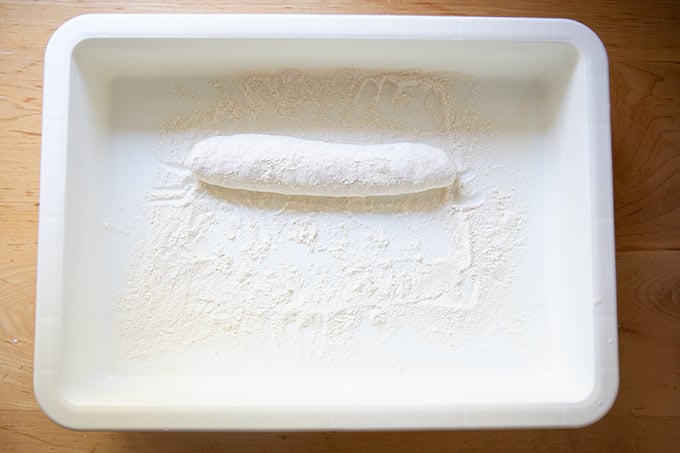
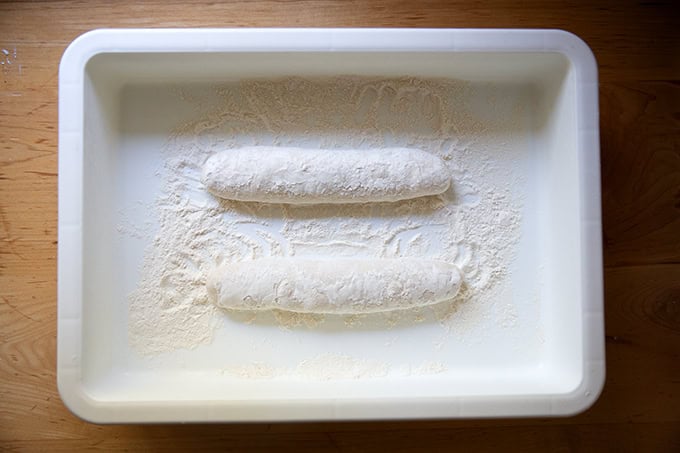
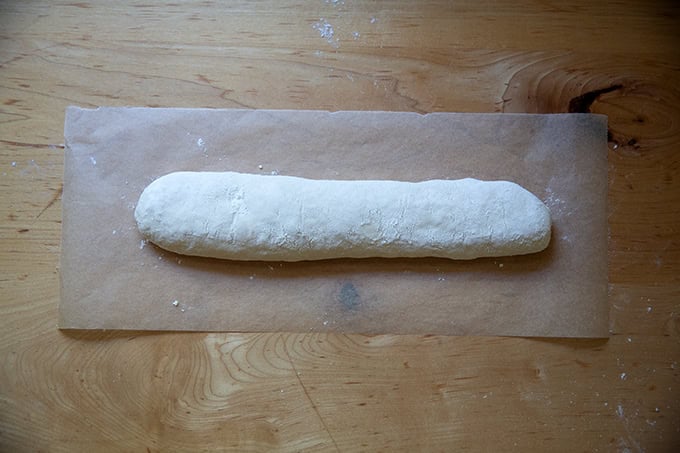
Shaping baguettes takes a little bit of practice, but I find using cold, refrigerated dough makes the process easy. Below you will find video and photo guidance of the process. On baking day, turn the dough out onto a work surface. I do not use any flour here, but if you find the dough to be sticky, use flour lightly as needed. Pat the dough into roughly a 6×7-inch rectangle: Fold the dough from the top down: Rotate the dough 180 degrees, and fold from the top down (also known as an “envelope” fold). Then fold again from the top down, essentially folding the envelope in half. Then, repeat (see video for guidance): Pinch the seam closed. Turn over so that the seam is down and gently roll. Transfer to a floured, lidded storage vessel. I love these DoughMates, but you could use a large Tupperware or a 9×13-inch dish tucked inside a 2-gallon ziptop bag. Often I’ll proof two at one time, though I try to stagger the entry of each by 30 minutes so as to avoid overproofing the dough. Cover the container and let the dough proof for 2.5 to 3 hours or… … until it feels very light and airy to the touch. One assessment tool you can use is the “poke” test: using a lightly floured finger, poke the dough making an indentation roughly 1/2-inch deep; if it springs back immediately, the dough needs more time; if it springs back slowly initially, but then holds a partial indentation — in other words, if it doesn’t completely refill — the dough is ready to be baked. (And if it doesn’t spring back at all, the dough is overproofed, but push on anyway, because it may bake up just fine.) I don’t love this method because I find it to be misleading: my dough behaves nearly the same way at the 2-hour mark as it does at the 3-hour mark, and yet my baguettes consistently have a lighter, airier crumb if I wait 3 hours before baking them. Nonetheless, it is a tool you can use.
Part III: Baking
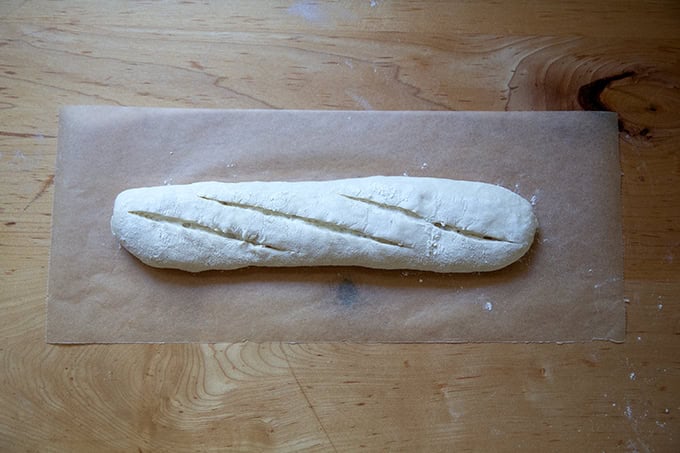
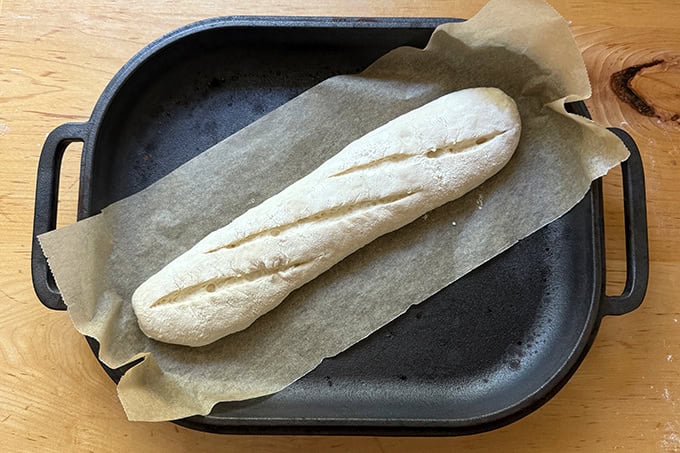
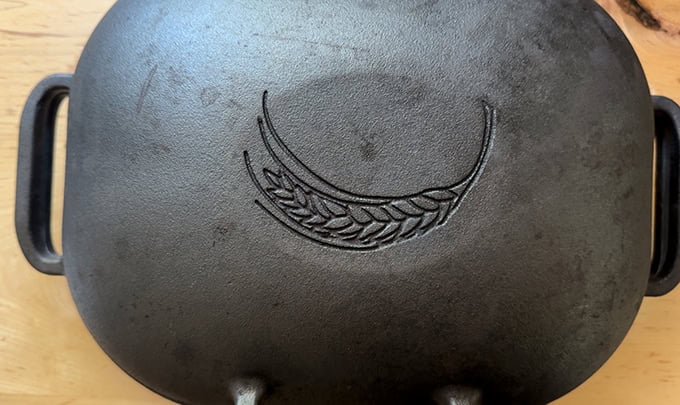
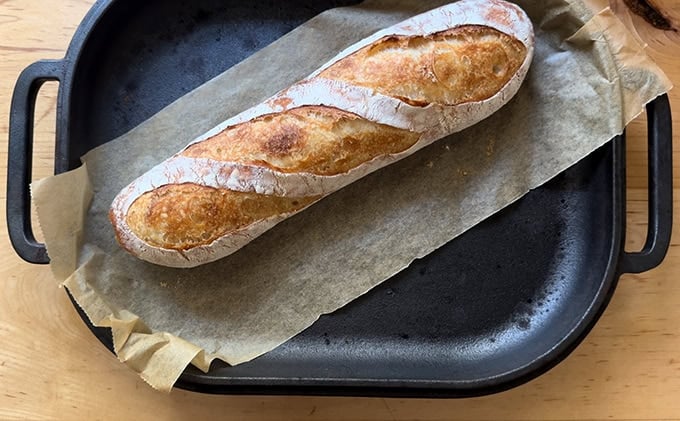
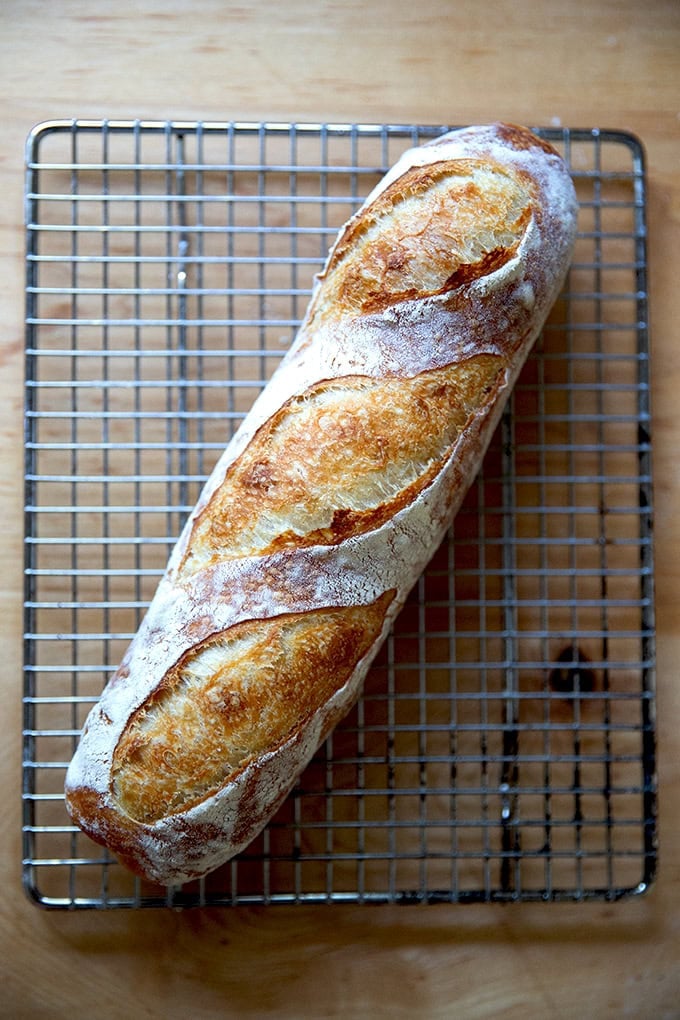
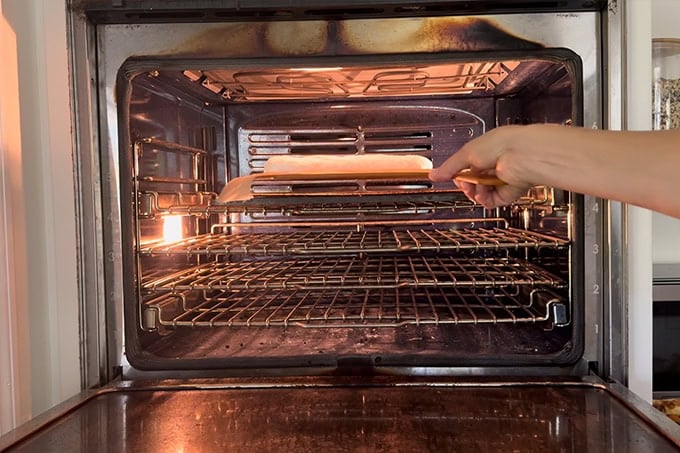
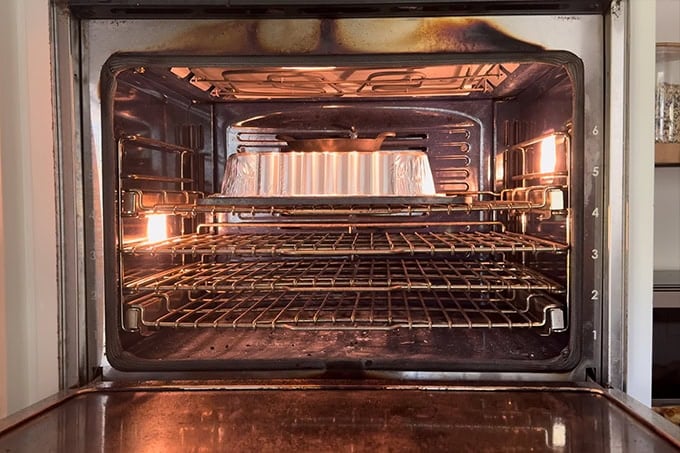
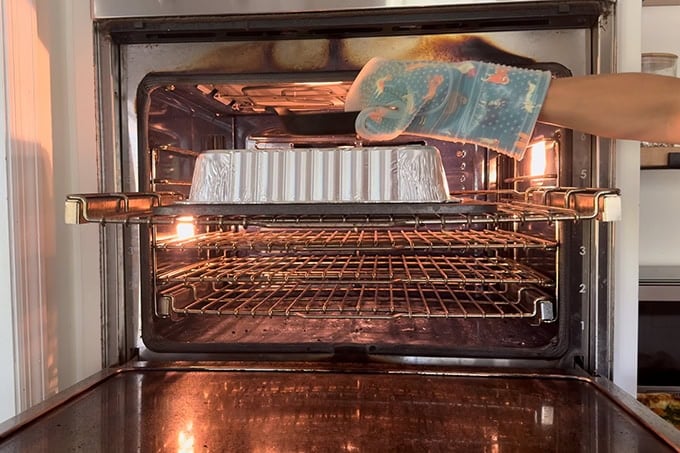
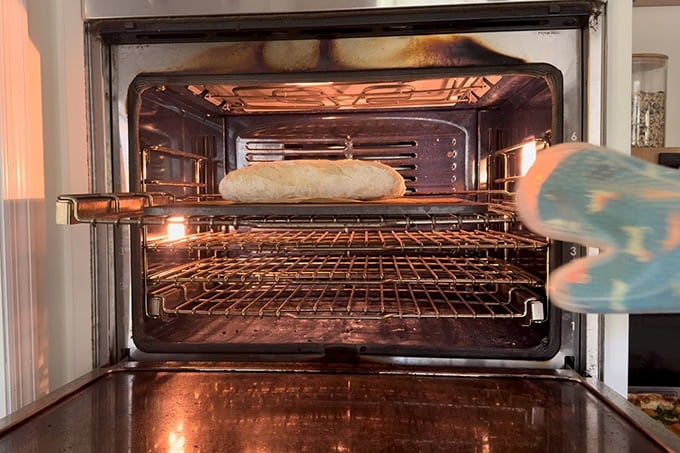
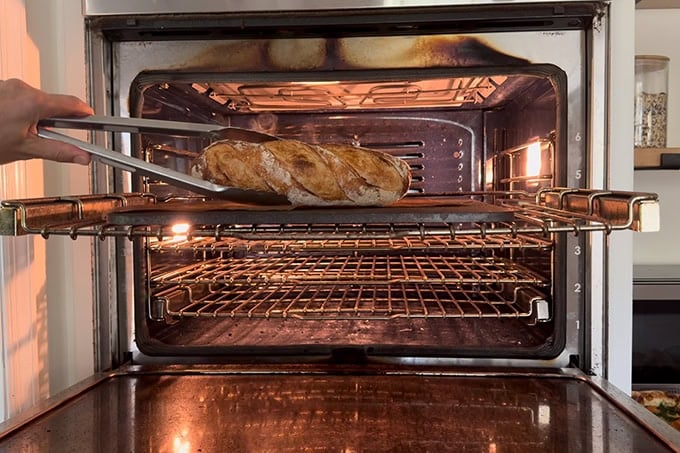
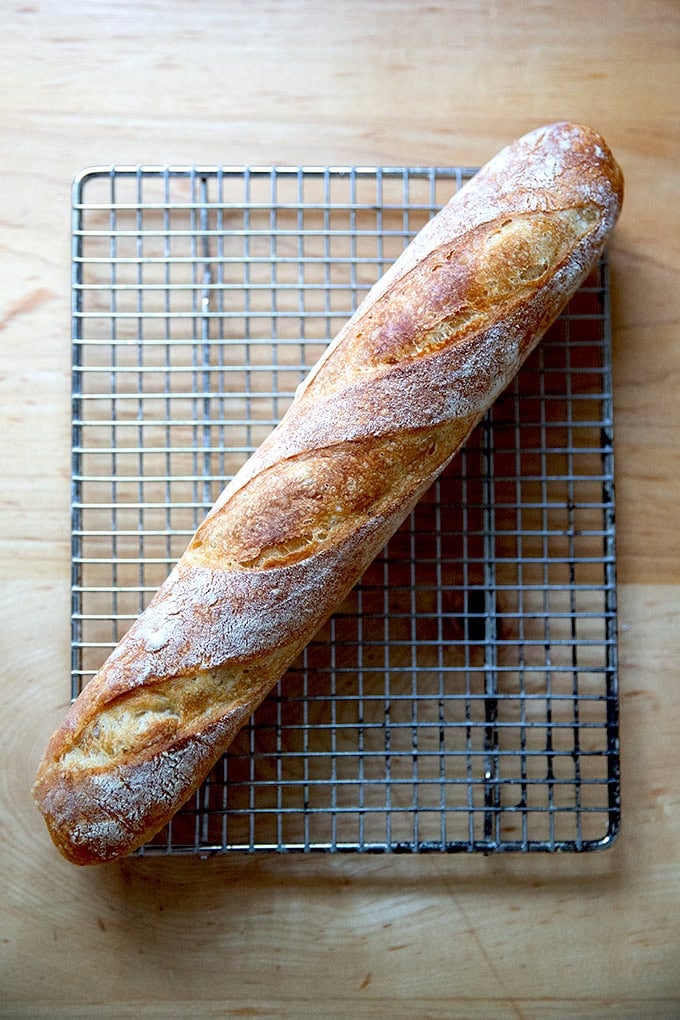
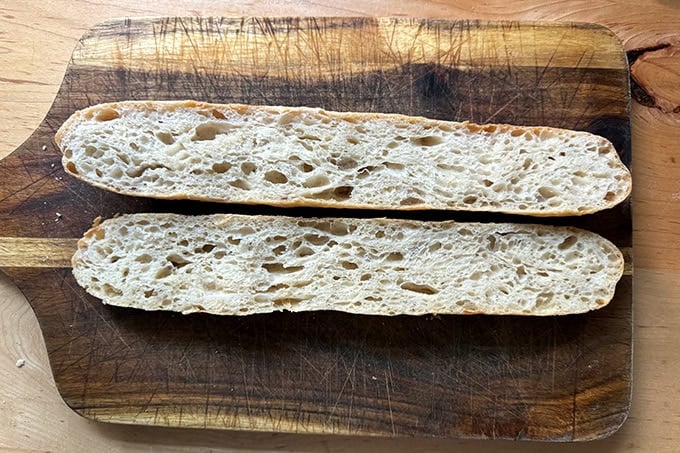
When the dough is ready for baking, remove it from the DoughMate and place it on a sheet of parchment paper — I take full sheets, fold them in half lengthwise, then cut them in half. Use a razor blade to score it. Then bake it… Method 1: Preheated Challenger Bread Pan. Place the Challenger or other oblong-shaped Dutch oven into an oven and preheat to 450ºF. This takes roughly 30 minutes in my oven. Lower the scored log, parchment paper and all into the preheated pan. Cover it and return it to the oven for 10 minutes. Uncover it, and return it to the oven for another 10 minutes… … or until the baguette is beautifully golden brown: Transfer to a cooling rack. Let cool for 15 minutes or so before… … serving. As noted above, I’ve been experimenting with Petra 0102 flour. The baguette on the left is made with Petra flour; the one on the right is King Arthur bread flour. Left: Petra flour; right: King Arthur bread flour. Method 2: Baking Steel or stone. Note: This method is inspired by this post on Serious Eats. Place a Baking Steel (the original or the pro) or a baking stone in the middle of your oven and preheat it to 450ºF. This may take 30 or so minutes. Score your dough: Then shimmy it onto the hot Baking Steel or pizza stone using a peel (this is my favorite peel). Cover the baguette with a disposable aluminum pan (lasagna-sized) and weigh it down with something heavy enough to seal it down without collapsing it: Bake for 10 minutes. Then remove the weight and pan. Continue baking the baguette for another 10 minutes… … or until it’s golden and bronzy to your liking: Let cool for 20-ish minutes or so before halving: A few other bakes with this method: left Petra; right KAF bread flour. The below pictured loaf is made with KAF bread flour, and this dough experienced no refrigeration: I mixed the dough on Friday night, portioned it and balled it up Saturday morning, let the balls rest in a DoughMate for 2 hours or so, shaped into baguettes and let rest again for another 2 hours; then baked: Bonus Method: Covered Emile Henry Baker I bought this Emile Henry baguette baker on a whim several years ago but it has mostly sat unused in my basement. I pulled it out to experiment because when I mentioned I had been baking baguettes in my newsletter, someone emailed me telling me she had just purchased an Emile Henry baguette baker and was looking forward to using it. I was incredibly pleased by the results, which consistently produced a beautiful crust if slightly less crusty than the two methods outlined above. The crumb, while light, similarly isn’t as open or airy as the other two methods. That said, it’s still delicious. Moreover, a slightly smaller amount of dough might produce a lighter, airier baguette because it wouldn’t fill the baguette well so tightly. This method is perhaps the easiest of the three in that you don’t have to preheat a vessel. For this sort of baker, simply place the baguette into the buttered well, score it, then bake covered at 450ºF for 10 minutes and then uncovered for 10 more minutes. For its ease, this is a great option: The crumb is the least open of the three methods, but the flavor is still great:
5 from 22 reviews
Notes
For best results, use a scale to measure everything. Flour: In most of my experiments I used King Arthur Bread flour but I also got excellent results and often an even more open crumb when I used Petra 0102 Flour, which is made from partially sprouted wheat. Salt: I use Diamond Crystal kosher salt, but you could use fine sea salt in its place. Again, for best results use a scale to measure. 16 grams of salt may seem like a lot, but the rule for bread and pizza dough is that the amount of salt should be 2 to 3% the weight of the flour. 16.5 grams is 3%; 11 grams is 2%. If you are using Diamond Crystal kosher salt, you’ll use roughly 5 teaspoons. If you are using Morton kosher salt or fine sea salt, you’ll use 2.5 teaspoons. Yeast: SAF instant yeast is my favorite.
Timing
Plan Ahead: This recipe calls for a long slow initial rise of roughly 6-10 hours followed, ideally, by some fridge time.
Example Timeline #1: Fridge Time
Wednesday Evening: Mix Dough
Thursday Morning: Ball Up Dough, Transfer to Fridge
Friday Afternoon (or any subsequent afternoon for as long as a week): Remove Dough Ball From Fridge 3 Hours Prior to Baking
Friday Evening: Bake Baguette
Example Timeline #2: No Fridge Time
Thursday Evening: Mix Dough
Friday Morning: Ball Up Dough, Transfer to a Lidded Vessel (such as a DoughMate), Leave at Room Temperature for Two Hours.
Friday Midday: Shape the Dough Balls into Baguette Shape and Return to Lidded Vessel, Leave at Room Temperature for Roughly Two Hours More.
Friday Afternoon: Bake the Baguettes
Three baking tools for baguettes:
Challenger Bread Baker Baking Steel (the original or the pro) + a disposable aluminum lasagna pan Emile Henry Lidded Baguette Baker or other
Other Equipment:
Dough Storage Containers: This set of four has become a favorite. DoughMate storage vessel parchment paper razor blades