These bread rolls are a staple in my house – fried or not, we relish them anyhow. We love these vegan bread rolls, as they are reasonably portable, convenient to eat, and mess-free. Simply, grab the rolls on your way out to work, or kids can eat them on their way to school. It’s that simple! The stuffing is carefully sealed and wrapped in a damp slice of bread and shaped into a cylindrical roll. It is then deep-fried, baked or air-fried and served with mint or cilantro chutney or tomato sauce. Traditionally bread rolls are pan-fried or deep-fried, but the contemporary version of airfrying is also an excellent option for those on the lookout for healthier cooking methods.
Easy to prepare, Entirely oil-free and mess-free, Highly customizable, Portable snack or breakfast Can be prepared in bulk and stored, and Kid-friendly, therefore, can be one of the best picks for the lunch box as well!
I can bet the kids, as well as the grown-ups, will love to delve into these hard-to-resist delicacies alike. Furthermore, This bread roll recipe is so simple; even the novice will get a chef kind-of of vibes when they cook something as easy as these rolls!
Air fryer — Pros
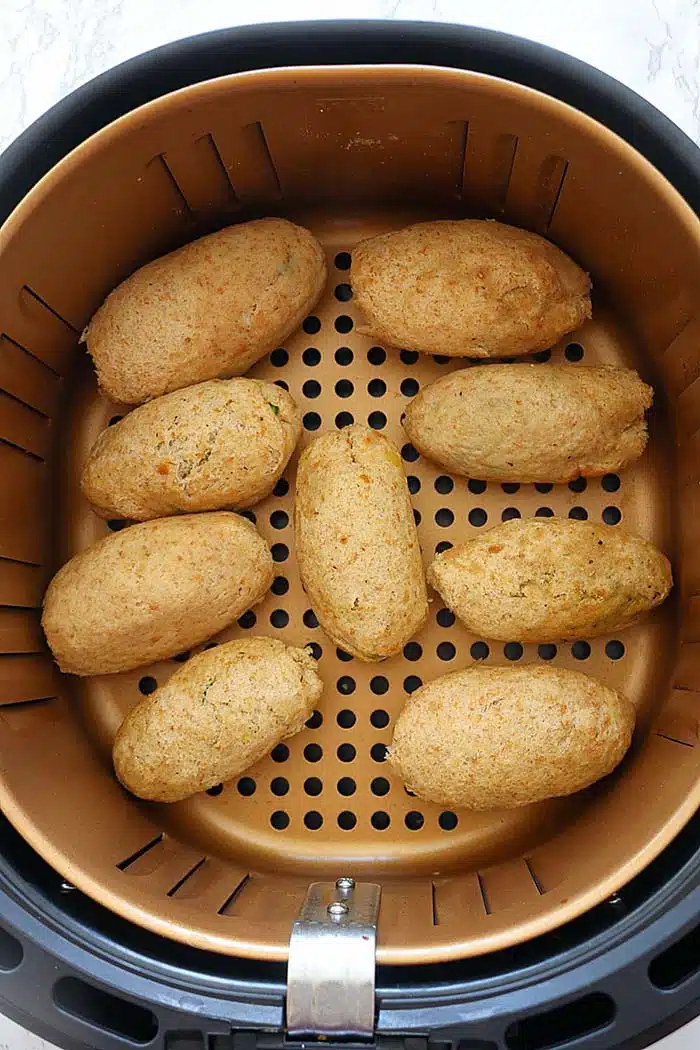
Air fryer is known for its healthier cooking method as it involves cooking by circulating hot air around the food. Air fried bread rolls are made with a constrained amount of oil or no oil at all. Needs no supervision while cooking. It is entirely mess-free as you don’t have to worry about the crumbs in the oil or have to deal with the smoke or smell of the oil in the house. That makes it an excellent way to cut down on fat and calories that frying in oil can add.
Air fryer — Cons
Air frying may take more time than deep frying.
Deep-frying — Pros
Deep frying is a faster way to cook these yummy bread rolls. When deep-fried correctly, with a regulated temperature, they will result in crispier rolls with the bread not soaking too much oil to make them feel greasy or oily in taste.
Deep-frying — Cons
Oil temperature is teh biggest culprit. While frying in oil, keep a check on the temperature of the oil. Medium-hot oil is needed for frying. If the oil is not hot enough, the bread rolls will soak up the oil and become soggy, and if the oil is too hot, the bread covering will turn brown quickly, leaving the stuffing uncooked.
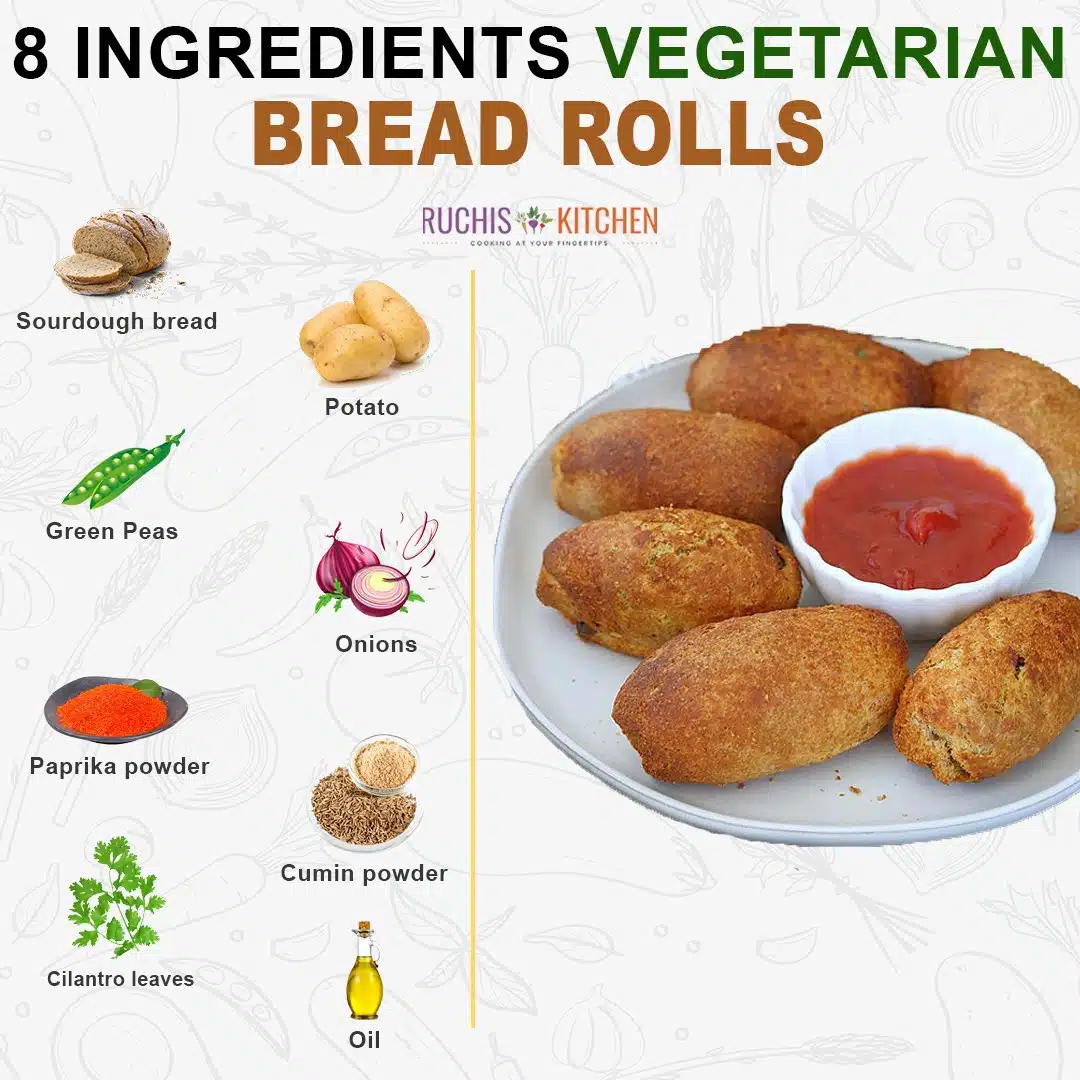
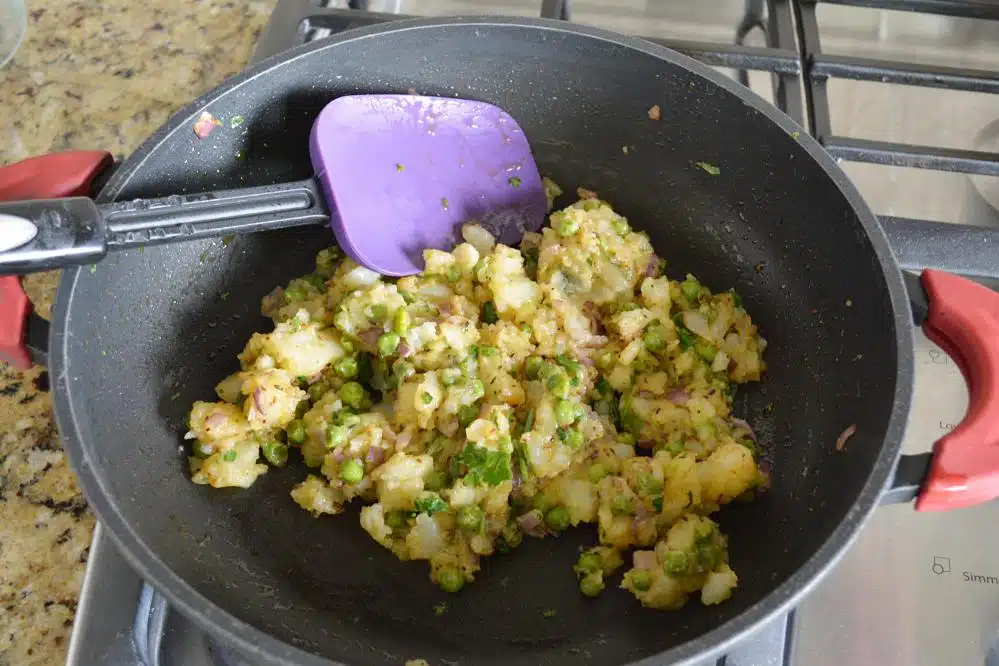
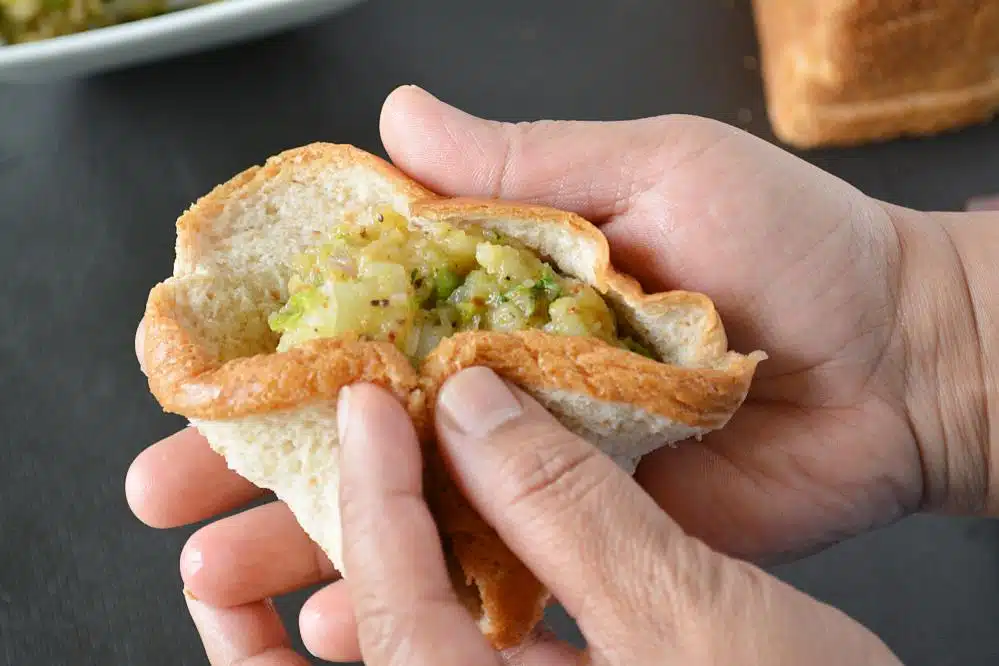
Potato — Most of my recipes use russet potatoes as they are low in moisture and, hence, easier to bring together. They also crisp up faster in the airfryer. Onions — They are added to bring flavor and crunch to the stuffing. Green Peas — Added for taste and nutrition. Paprika — Paprika adds a sweet-pepper flavor and color to the dish. Cumin Powder — Freshly prepared cumin powder works the best as it is most flavorful and aromatic. However, you can use the store-bought too. Cilantro leaves — For garnishing. Sauté — Heat oil in a large skillet or square pan. Add chopped onions and cook until the onion is translucent. Add boiled peas and cook for another 1-2 minutes. Stir in all the spices, mashed boiled potatoes, cilantro leaves, and stir everything together. Take it off the heat. Transfer the stuffing to a bowl and let it cool a bit. Stuff the bread — Stuff the bread with potato and peas stuffing. Take water in a bowl. Partially dip bread in water. The main idea is to make bread flexible enough to roll. Remove the bread from the water and squeeze hard to drain the excess water. Bread should not feel sticky in between your hands; if it does, press more to drain all the moisture. Place the cooled potato mixture in the center. Start rolling the bread inwards by bringing all the edges together. Keep rolling the bread until it forms a cylindrical shape. Make sure it is sealed from all sides. Repeat the process with the rest of the mixture until all the bread rolls are formed.
Once the cooking time is done, remove the rolls from the airfryer, set them on a plate, and serve warm with your favorite dipping sauce. Make a few extra rolls; as I assure you, you will just love to watch them disappear!
Bread — You can use brown bread, white bread, or even multigrain bread for this recipe, and each will taste as good. Dipping the water — Take care not to dip the bread for too long in the water. We just need to moisten it so that it takes shape easily. Instead of dipping in water, you may also sprinkle water, especially if your bread is fresh (fresh bread already has moisture in it). Customizable — You can stuff these bread rolls with potatoes and veggies of your choice to make them healthier, as breakfast needs to be the best start of the day: healthy and filling! And when you are air frying them, you are self-assured for serving the best to your family. Vegetables — To make it healthier, you may add grated or boiled/steamed veggies like beans, sweet-corn, beetroot, carrots, cabbage, etc. You can also add tofu or paneer (cottage cheese) to the stuffing. Other protein — You may also make the stuffing with Keema (minced meat) if you prefer non-vegetarian. Ensure that the Keema mixture is dry and moisture-free. Frying — When frying in oil, do not overcrowd the pan because you may break them while flipping. Make ahead — You will love how convenient these bread rolls can be, especially when you can prepare them ahead of time and store them in the fridge. When needed, you can toss them into the heated pan or airfryer, and there you are…. the crispy, crunchy delicacy with the spicy stuffing is ready to be devoured. Make a big batch — The recipe can be doubled or tripled by increasing the quantity of the ingredients. Give this quick recipe a try in your kitchen right away, and these airfryer-cooked bread rolls will keep you fueled up throughout your day of school, work, exercise, etc. Should you make this Stuffed Indian bread rolls, please let me know your thoughts by sharing your comment below. And don’t forget to share it with your family and friends.
SIMILAR INDIAN BREAKFAST RECIPES THAT YOU SHOULD TRY —